


























How to Set Up SendGrid in Per Diem to Send Emails from Your Custom Domain
With the SendGrid integration, merchants can send customer emails from their own custom email address instead of a generic system address. This allows your brand emails, such as order confirmations, updates, and notifications, to come directly from your business domain.
Instructions

- Log in to your Per Diem Merchant Dashboard.
- Go to Settings from the left sidebar
- Click Integrations
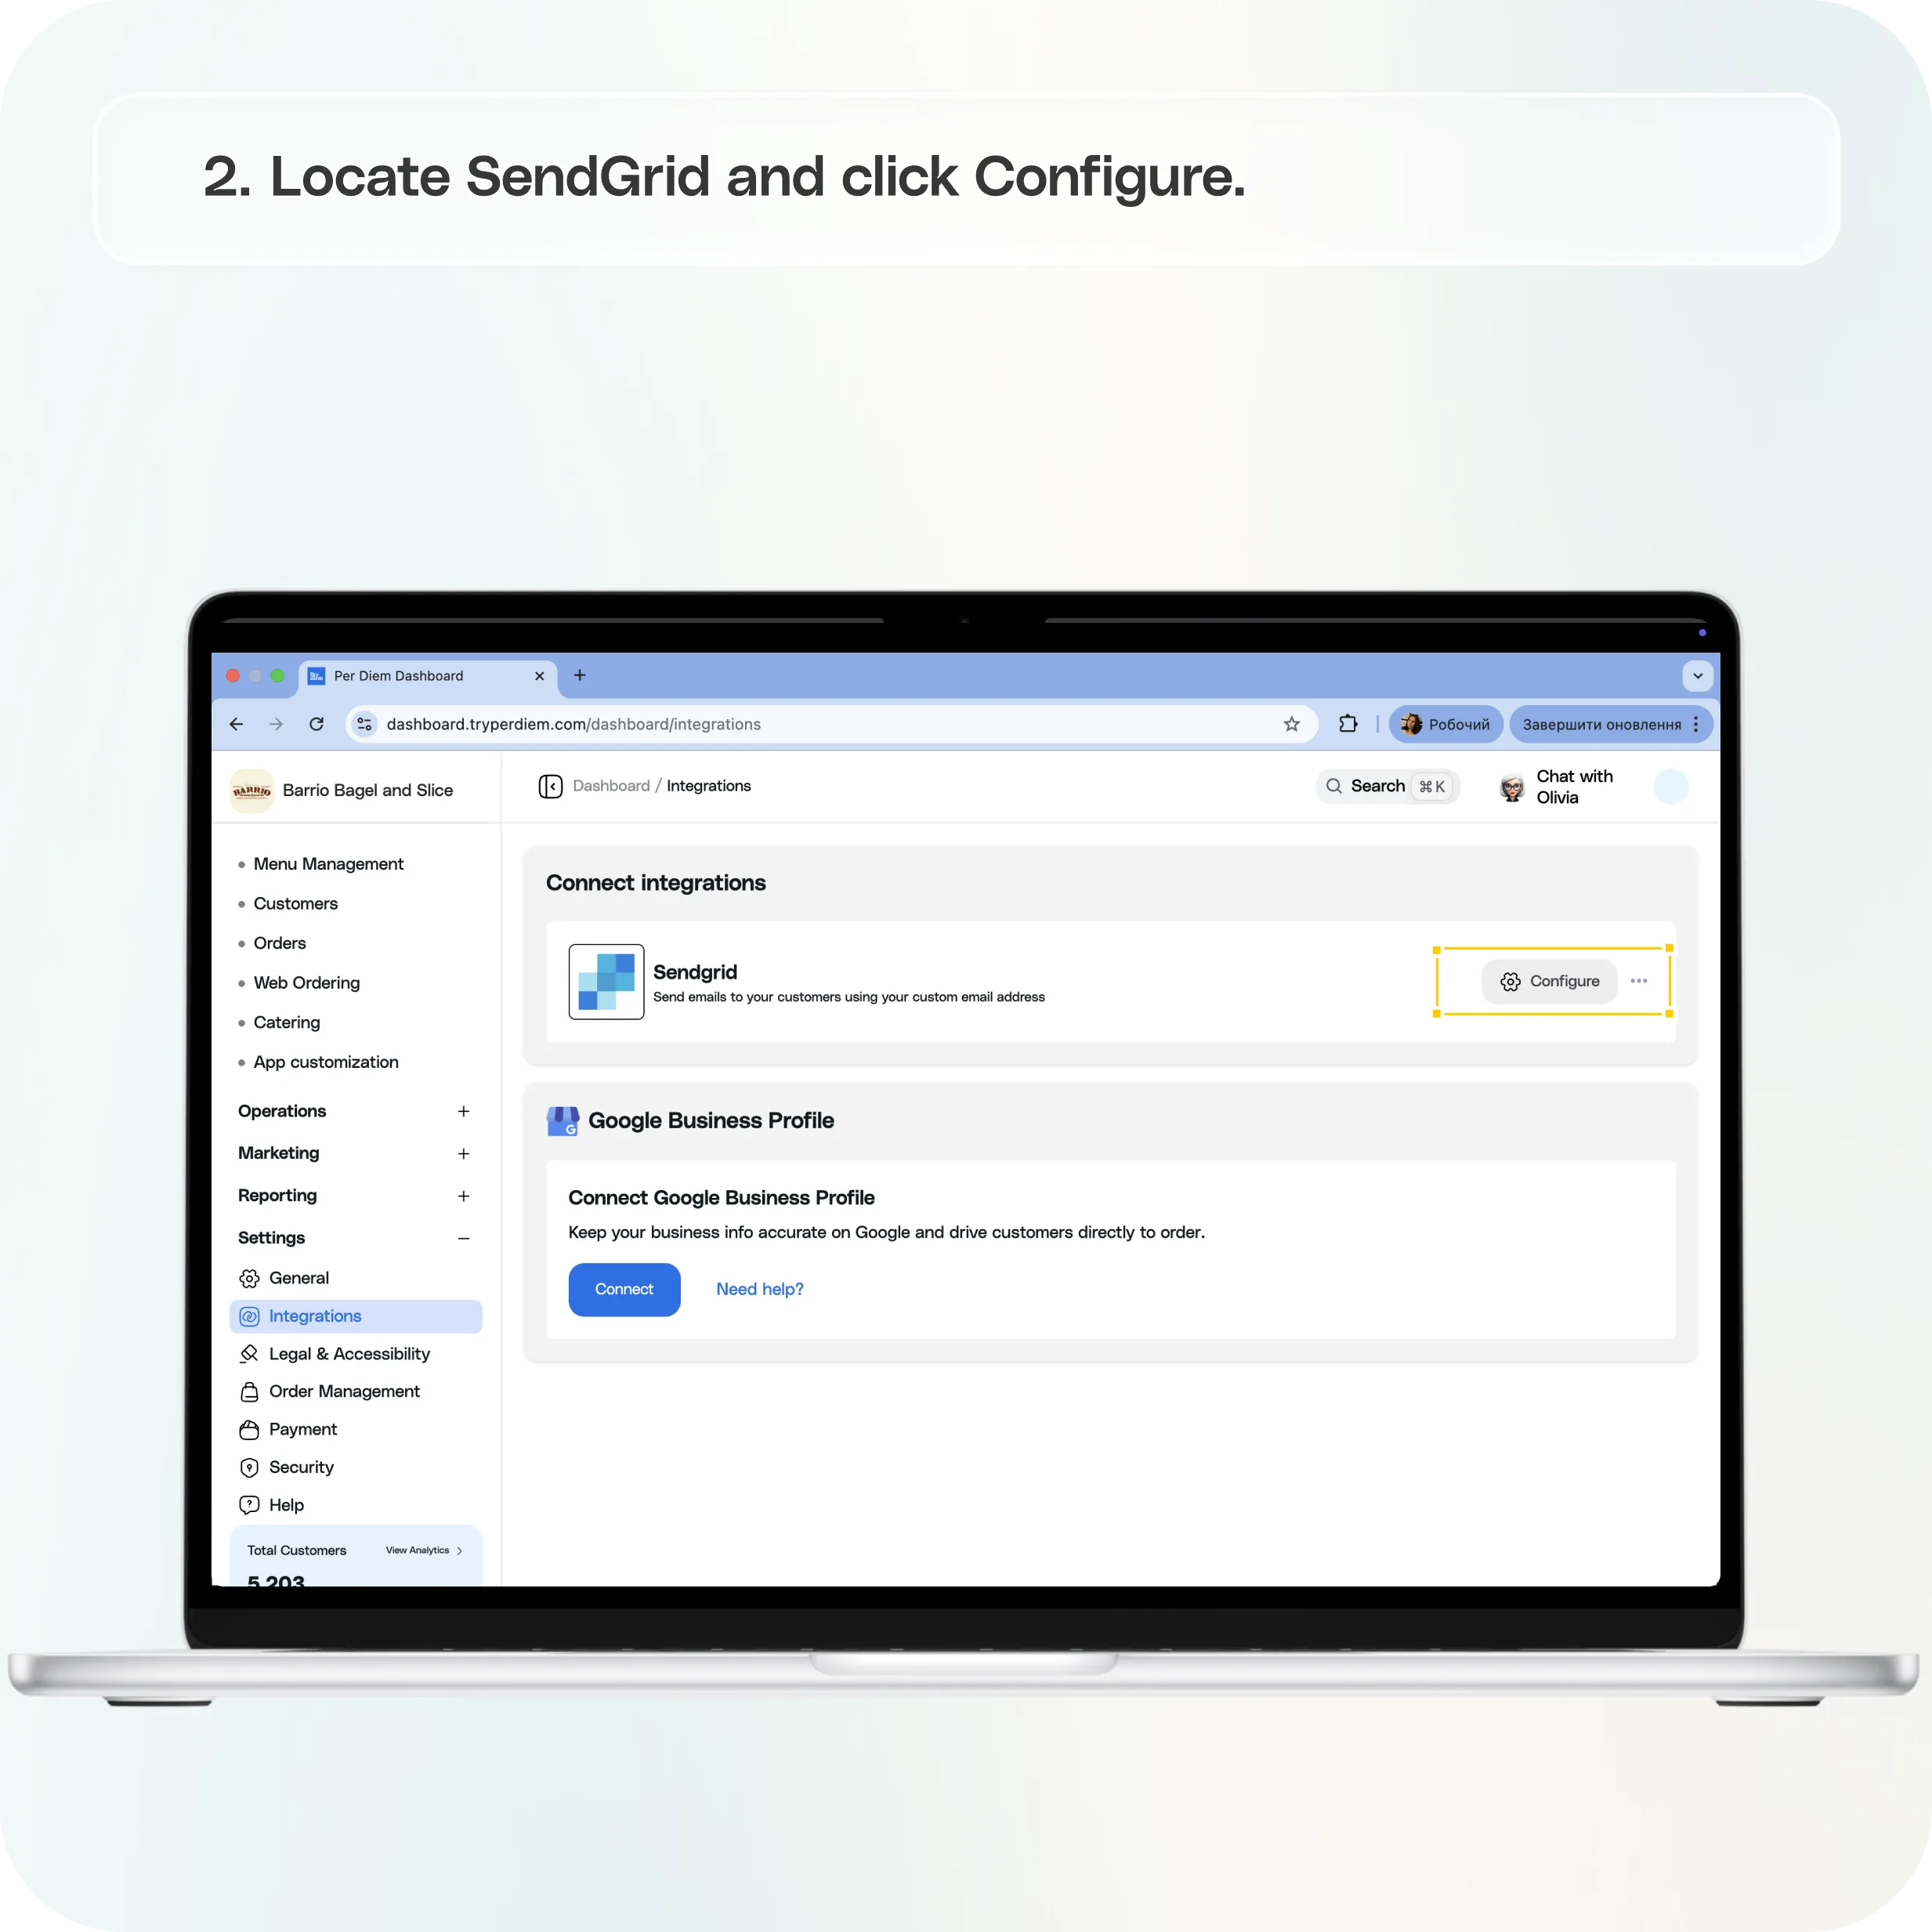
- Locate SendGrid and click Configure
Option 1: Register a Custom Domain (Recommended)
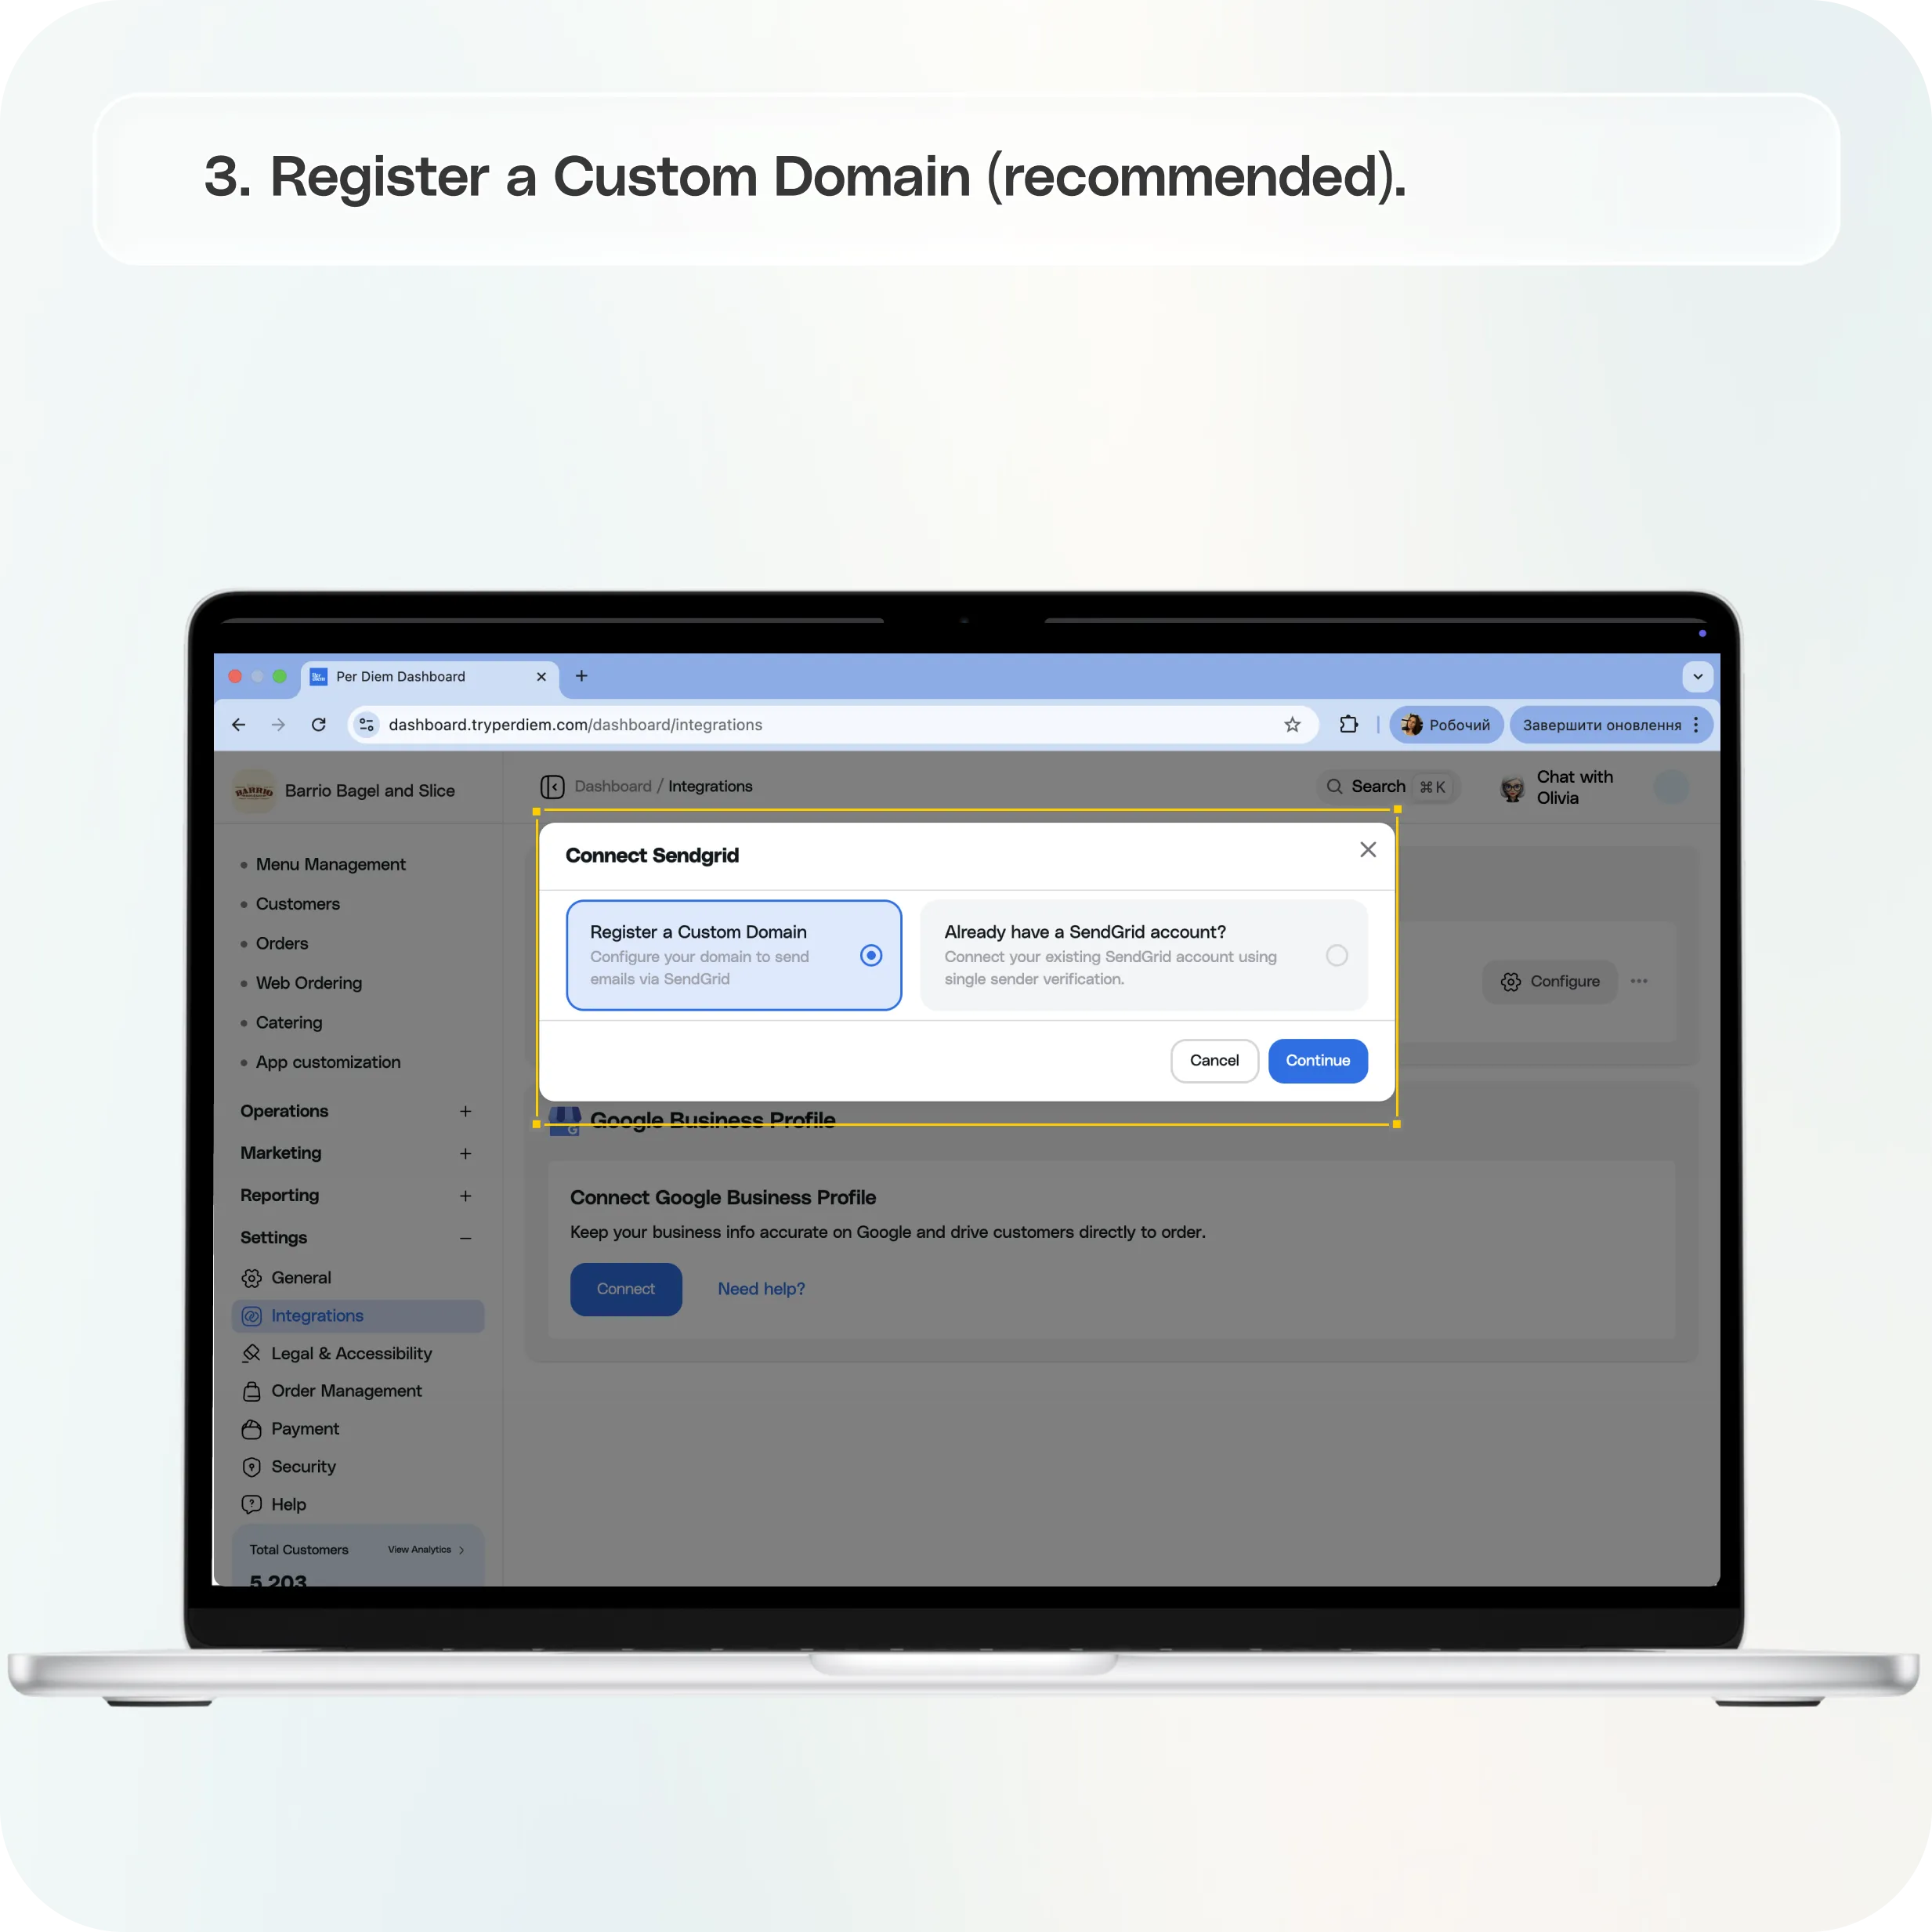
- Choose “Register a Custom Domain”
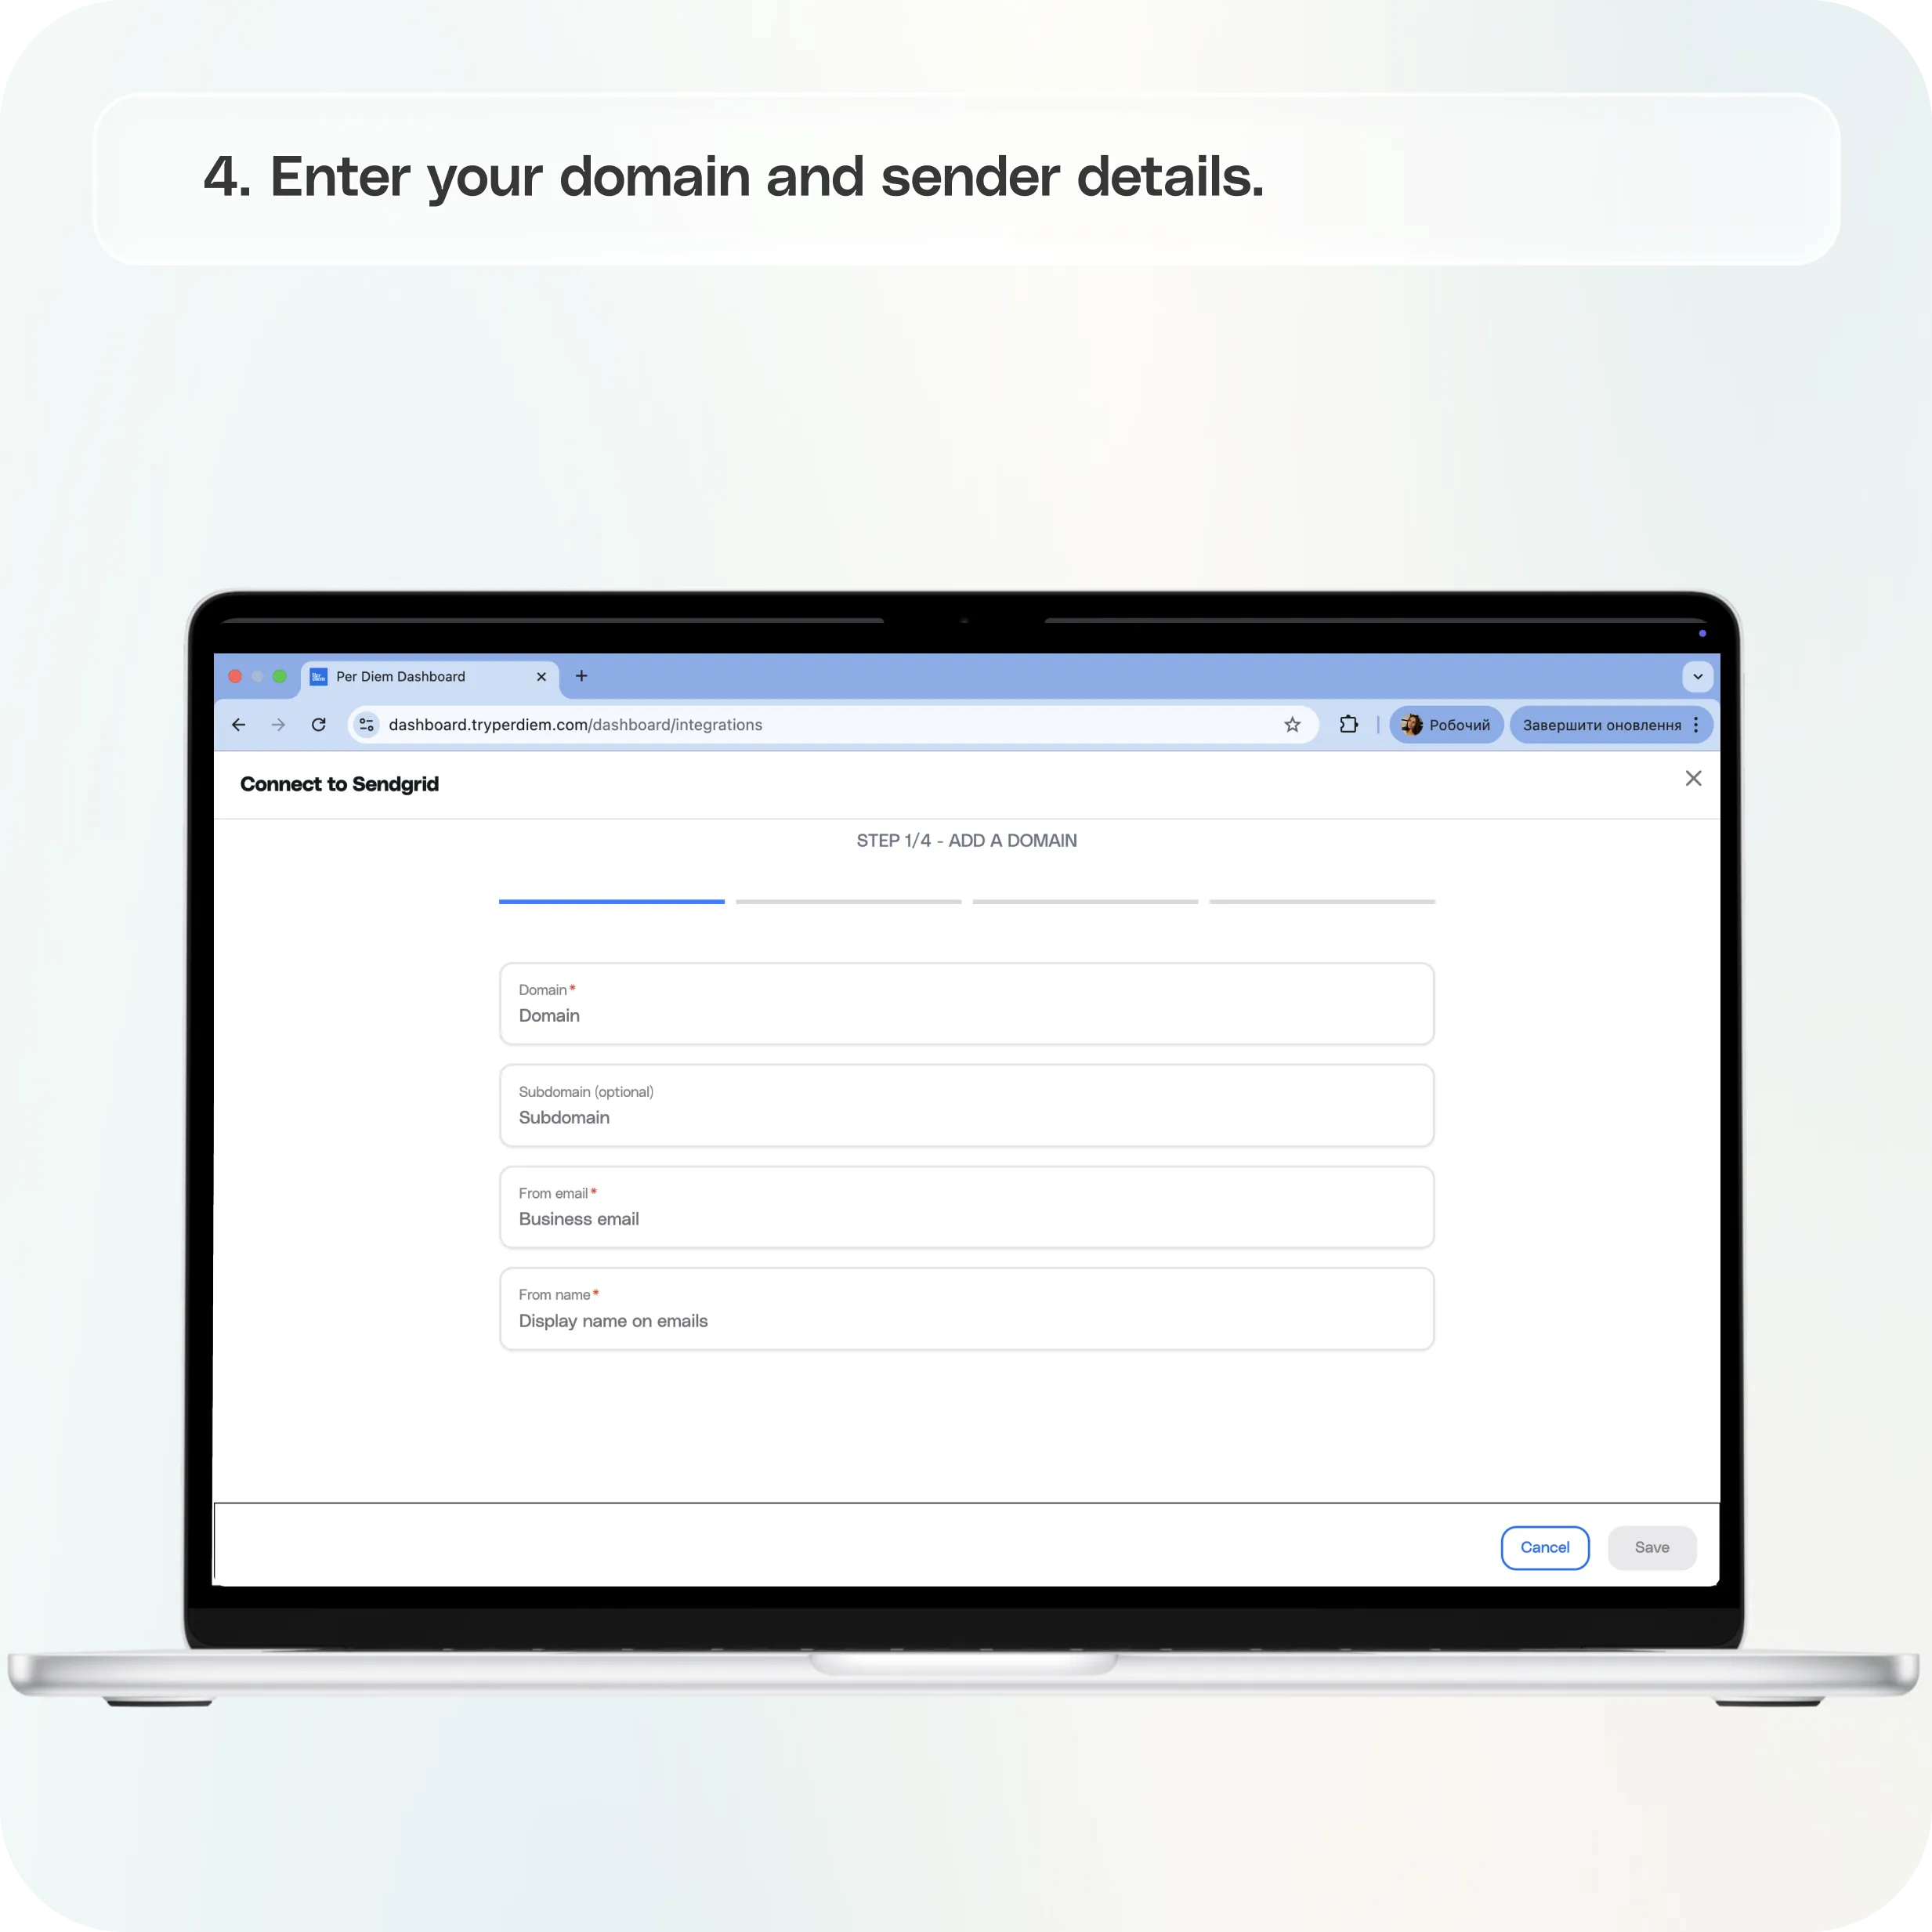
- Enter Your Domain and Sender Details
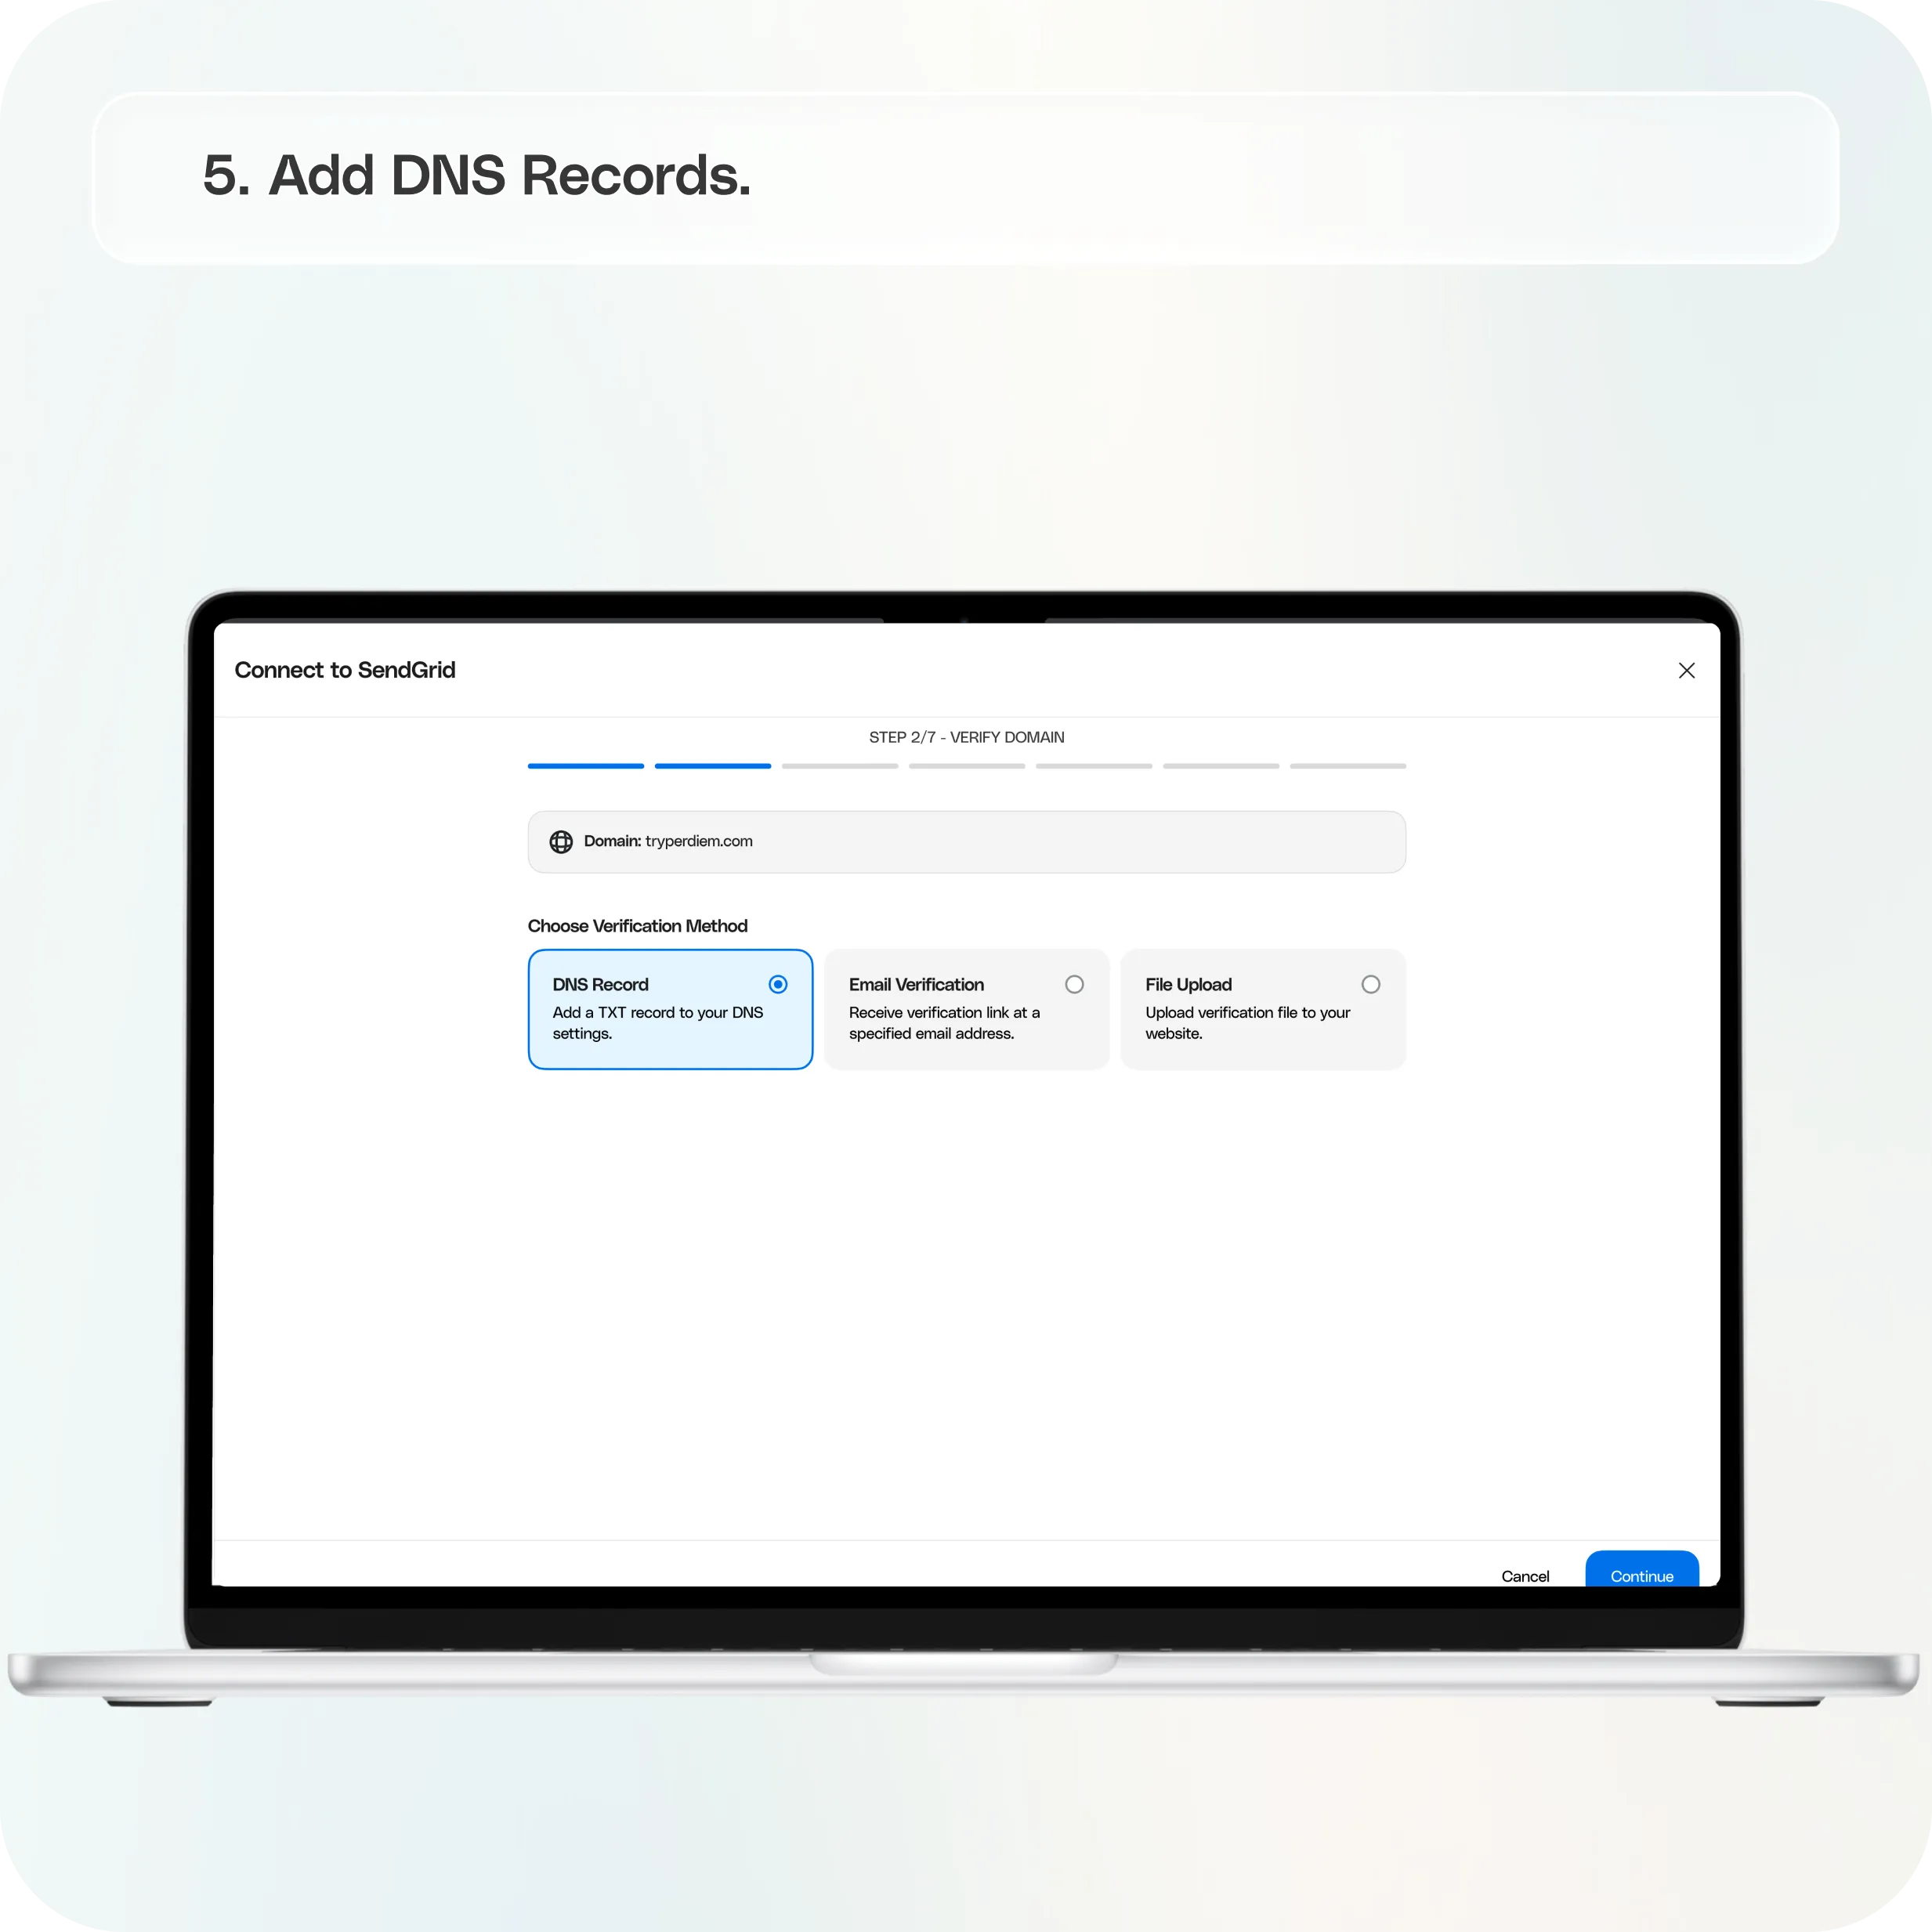
- Add DNS Records
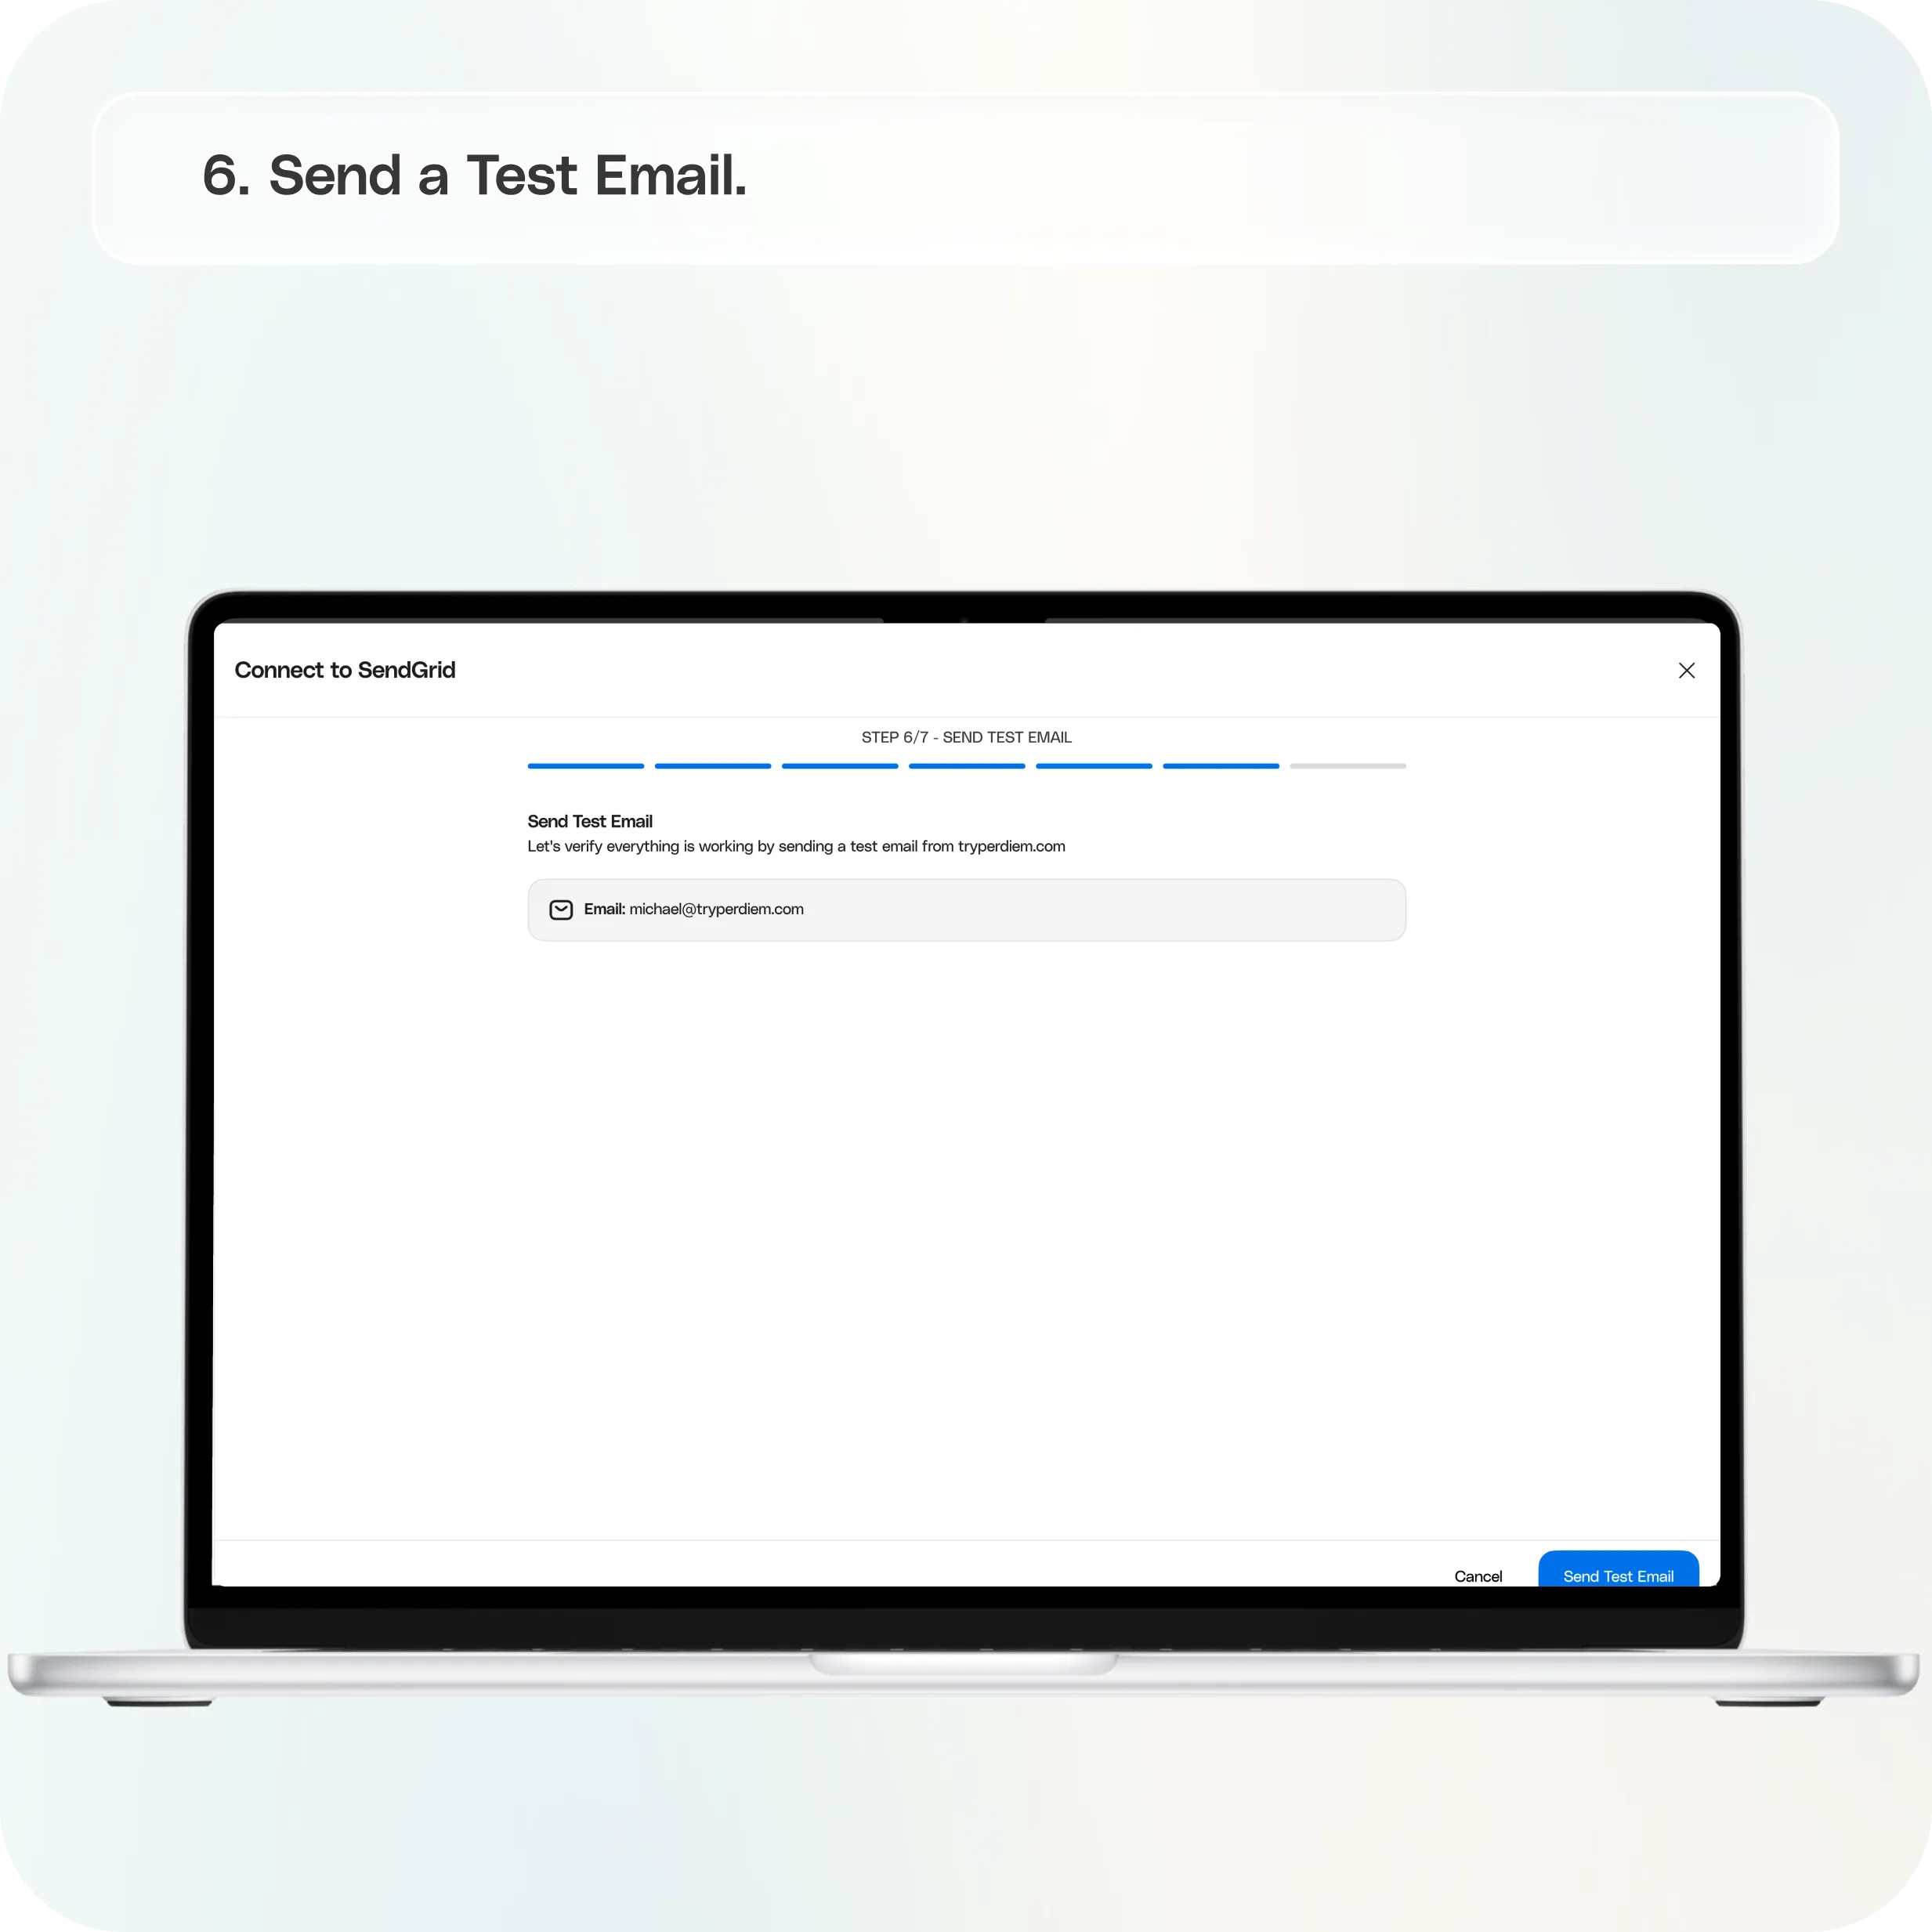
- Send a Test Email
- Complete Setup
Option 2: Single Sender Verification
- Select “Already have a SendGrid account?”
- Enter Sender Information
- Verify the Sender
Still require support?
Contact support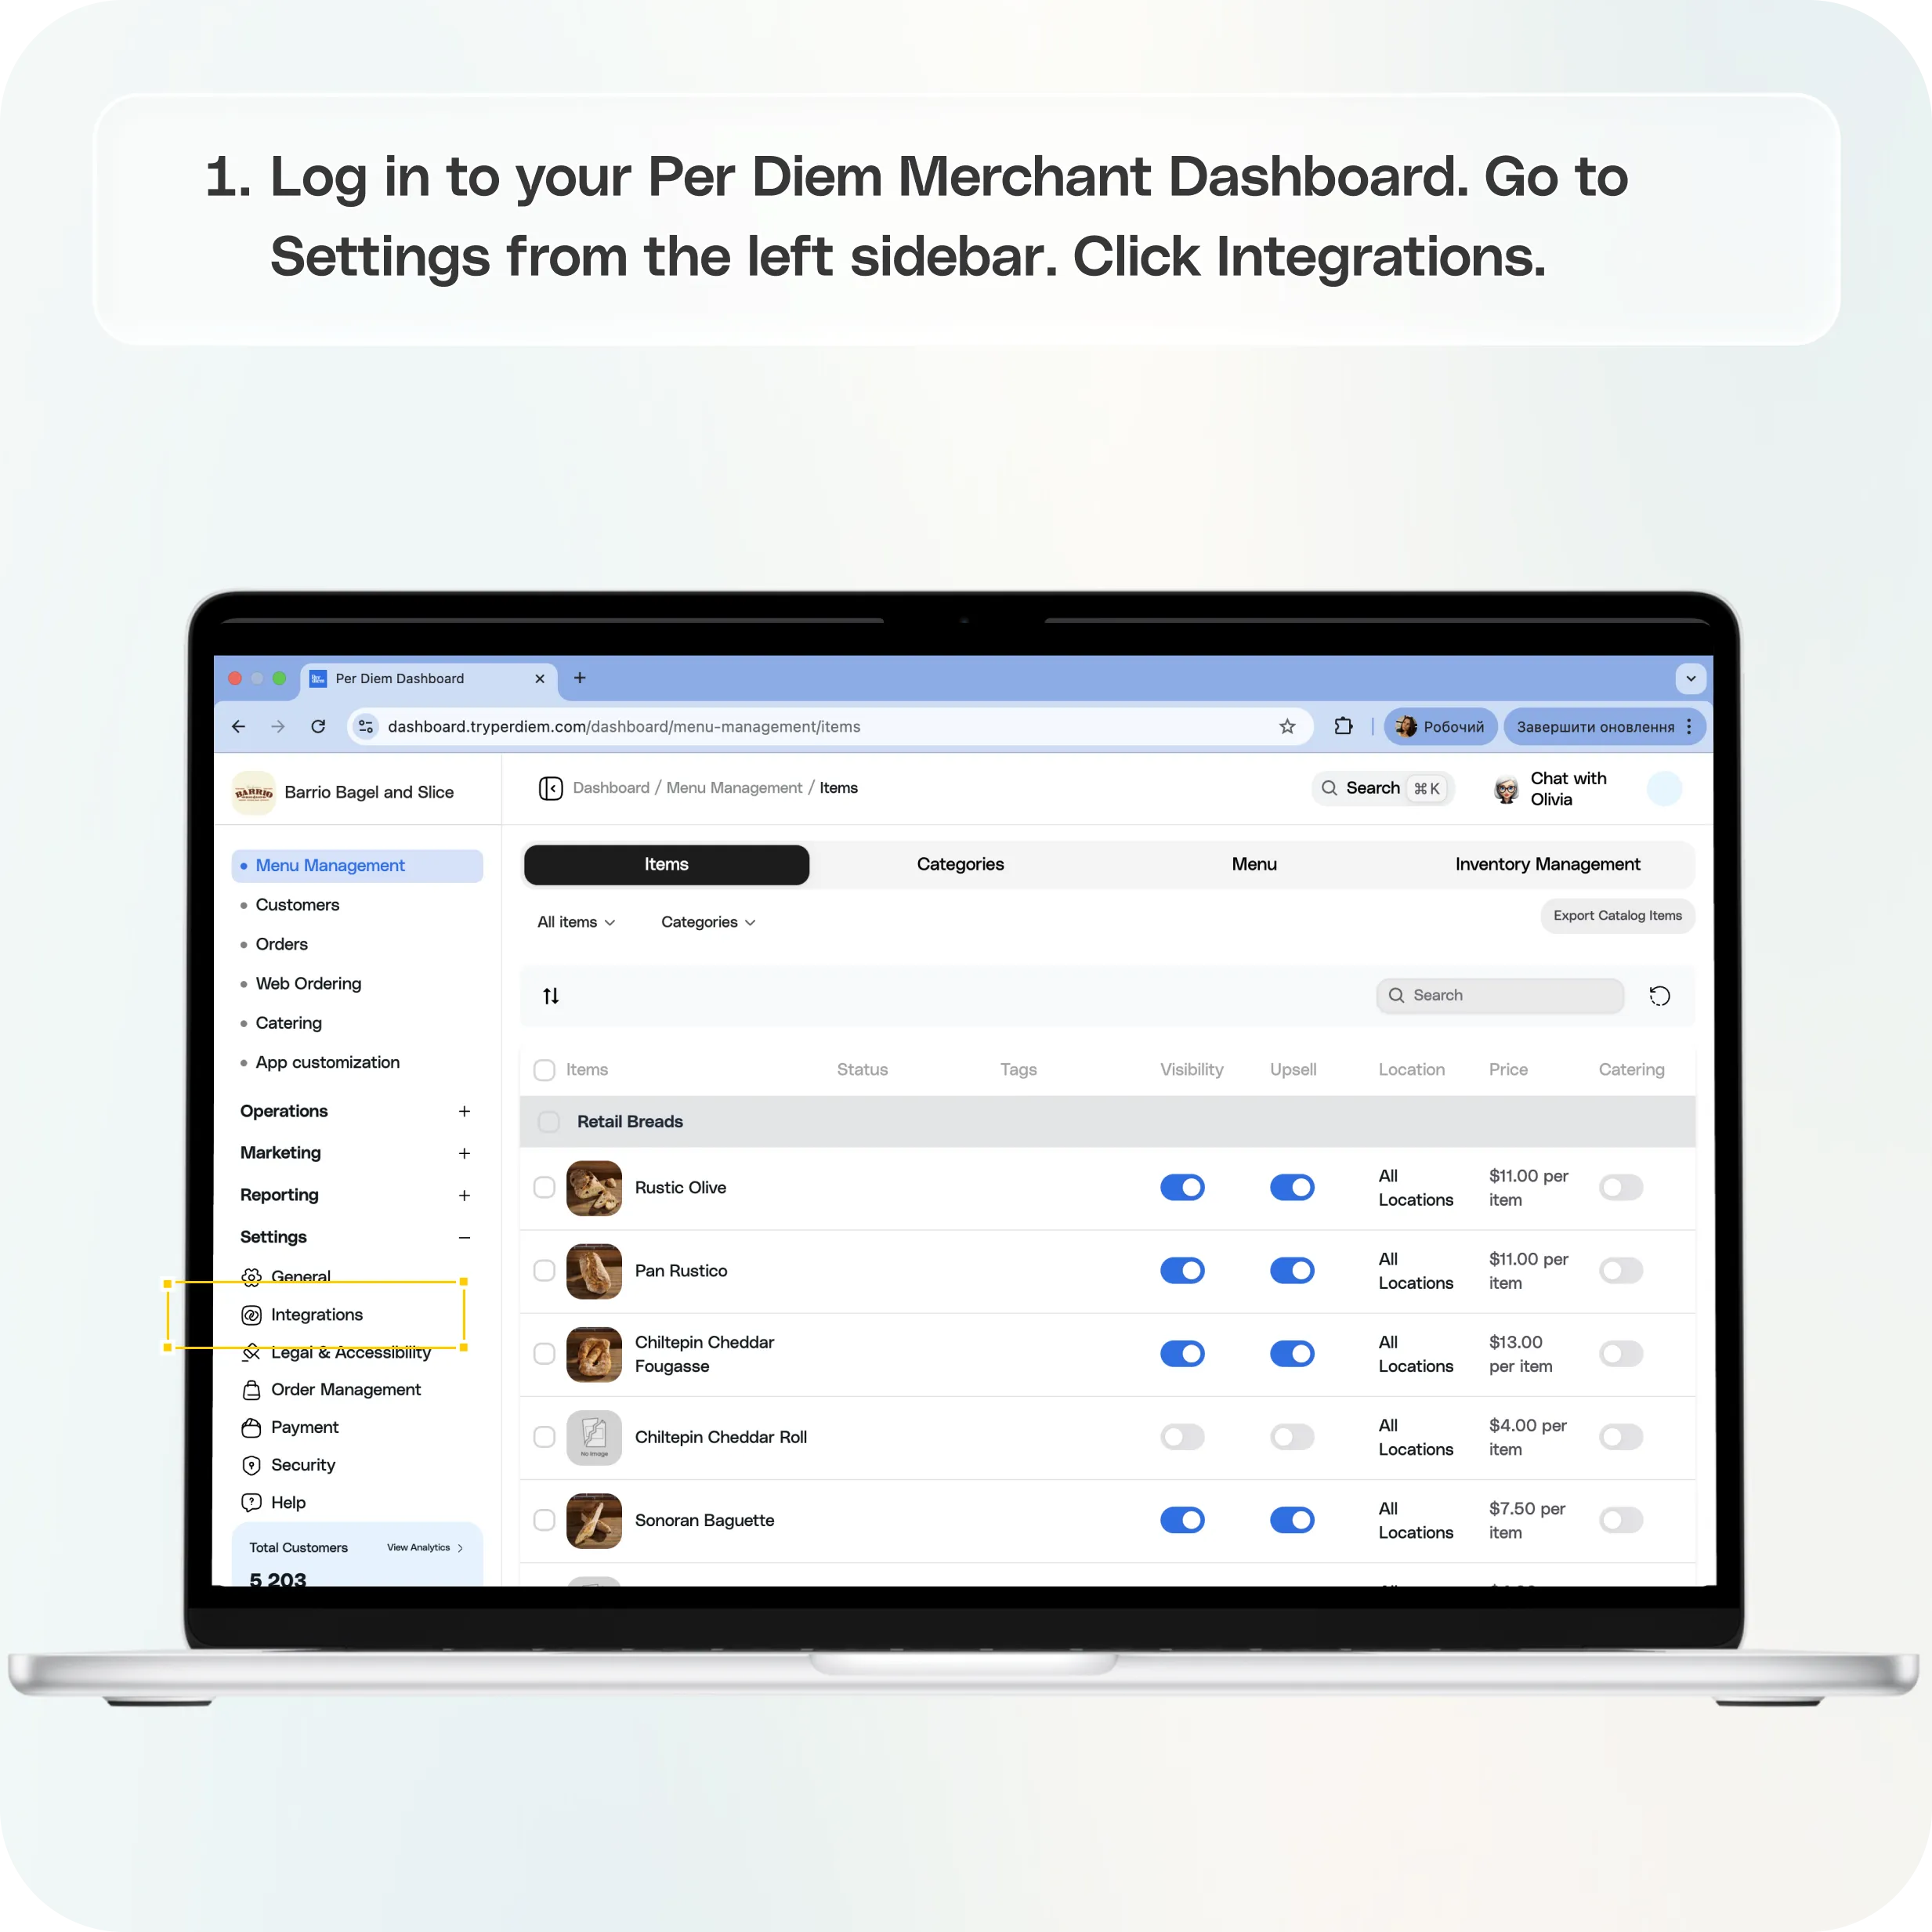
Where to Find SendGrid in the Dashboard
Step 1: Log in to your **Per Diem Merchant Dashboard
**Step 2: Go to Settings from the left sidebar
Step 3: Click **Integrations
**Step 4: Locate SendGrid and click Configure
Once you open the configuration screen, you will see two ways to connect to SendGrid.
**
Option 1: Register a Custom Domain (Recommended)**
Use this method if you want emails to be sent from your own domain, such as:
Step 1: Choose “Register a Custom Domain”
Select the Register a Custom Domain option and continue.
Step 2: Enter Your Domain and Sender Details
You will be asked to provide:
- Domain (example: yourstore.com)
- Subdomain (optional, example: mail)
- From Email (example: orders@yourstore.com)
- From Name (your business name)
Important: The From email must match your domain or subdomain.
Examples:
- Domain yourstore.com → orders@yourstore.com
- Domain yourstore.com with subdomain mail → orders@mail.yourstore.com
Save the details to proceed.
Step 3: Add DNS Records
The dashboard will generate three CNAME records required for domain authentication.
You will need to add these records in your domain provider’s DNS settings (such as GoDaddy, Cloudflare, Namecheap, AWS, etc.).
Once the records are added:
- Return to the dashboard
- Click Validate DNS Configuration
DNS updates may take 15–30 minutes to complete.
Step 4: Send a Test Email
After validation:
- Enter a test recipient email
- Click Send Test Email
- Confirm the email arrives from your custom sender address
Step 5: Complete Setup
Once the test email is successful, your domain will be fully connected, and customer emails will start sending from your custom email address.
**
Option 2: Single Sender Verification**
If you already use SendGrid or prefer not to configure DNS records, you can verify a single email address instead.
Example: you@company.com
Step 1: Select “Already have a SendGrid account?”
Choose the Single Sender Verification option.
Step 2: Enter Sender Information
Provide the required sender details:
- From name
- From email
- Reply-to name
- Reply-to email
- Business address
- City, state, zip code
- Country
- Sender nickname
Save the information to continue.
Step 3: Verify the Sender
SendGrid will send a verification email to the sender address you entered.
- Open the verification email
- Click Verify Single Sender
- Return to the dashboard and continue
Once verified, the sender will be active.
After Setup
Once SendGrid is connected:
- Emails will be sent from your custom sender address
- The Integrations page will show SendGrid as Active
From the same page, you can also:
- Edit sender details
- Resend verification emails
- Disconnect the integration if needed
Still have questions?Contact us
Ask anything or just say hi