
.svg)

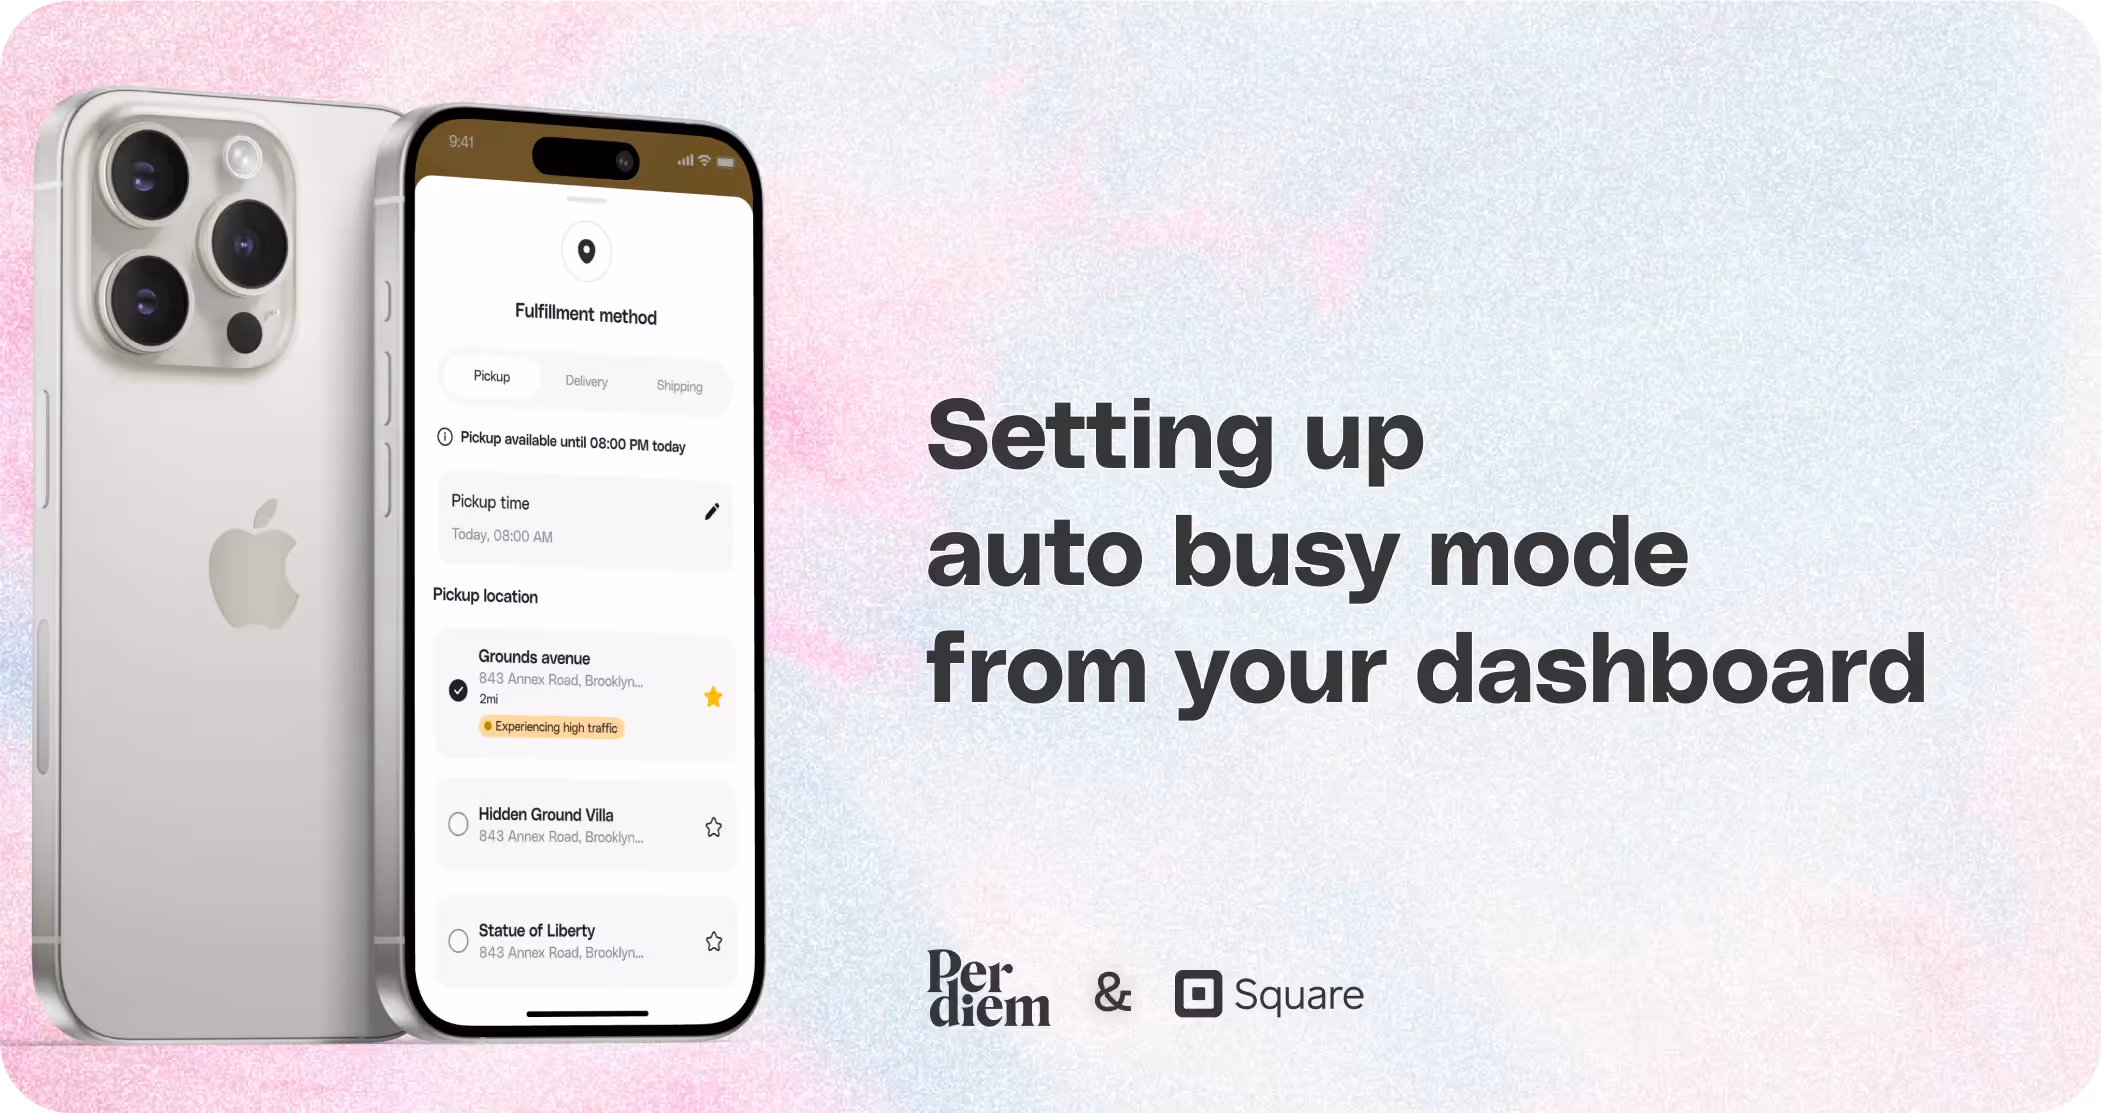
Setting up auto busy mode from your dashboard
Instructions
- Log in to your Per Diem merchant dashboard.
- From the left menu bar, choose "Operational Times" under the "Operations" section.
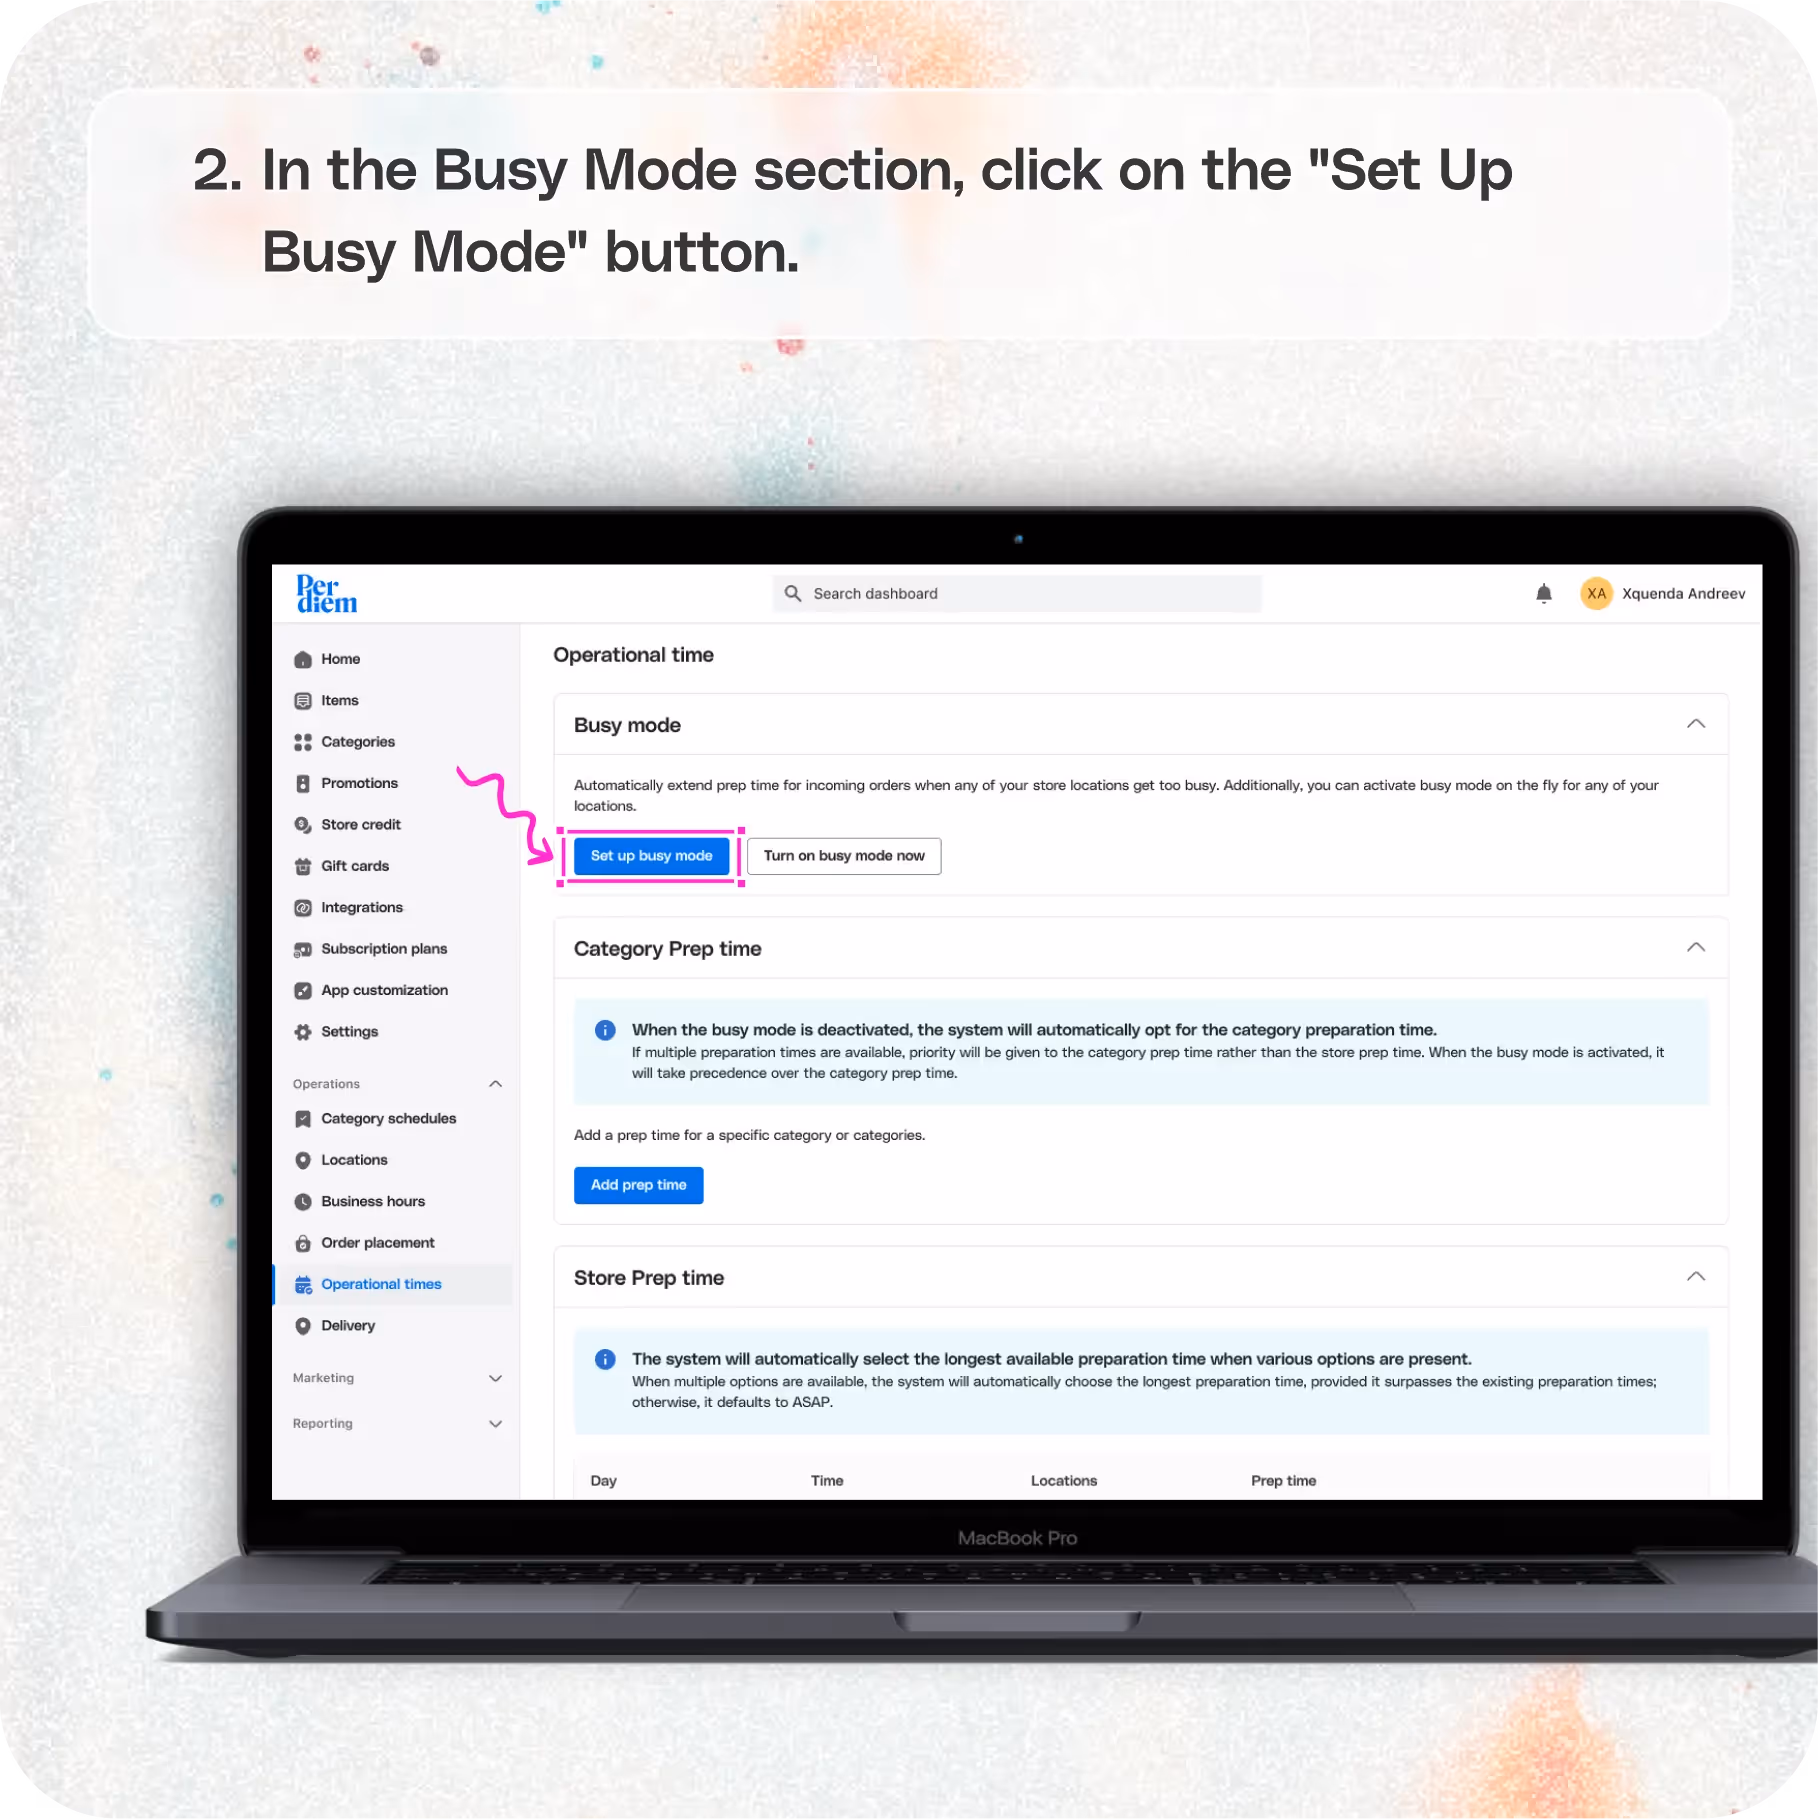
- In the Busy Mode section, click on the "Set Up Busy Mode" button.
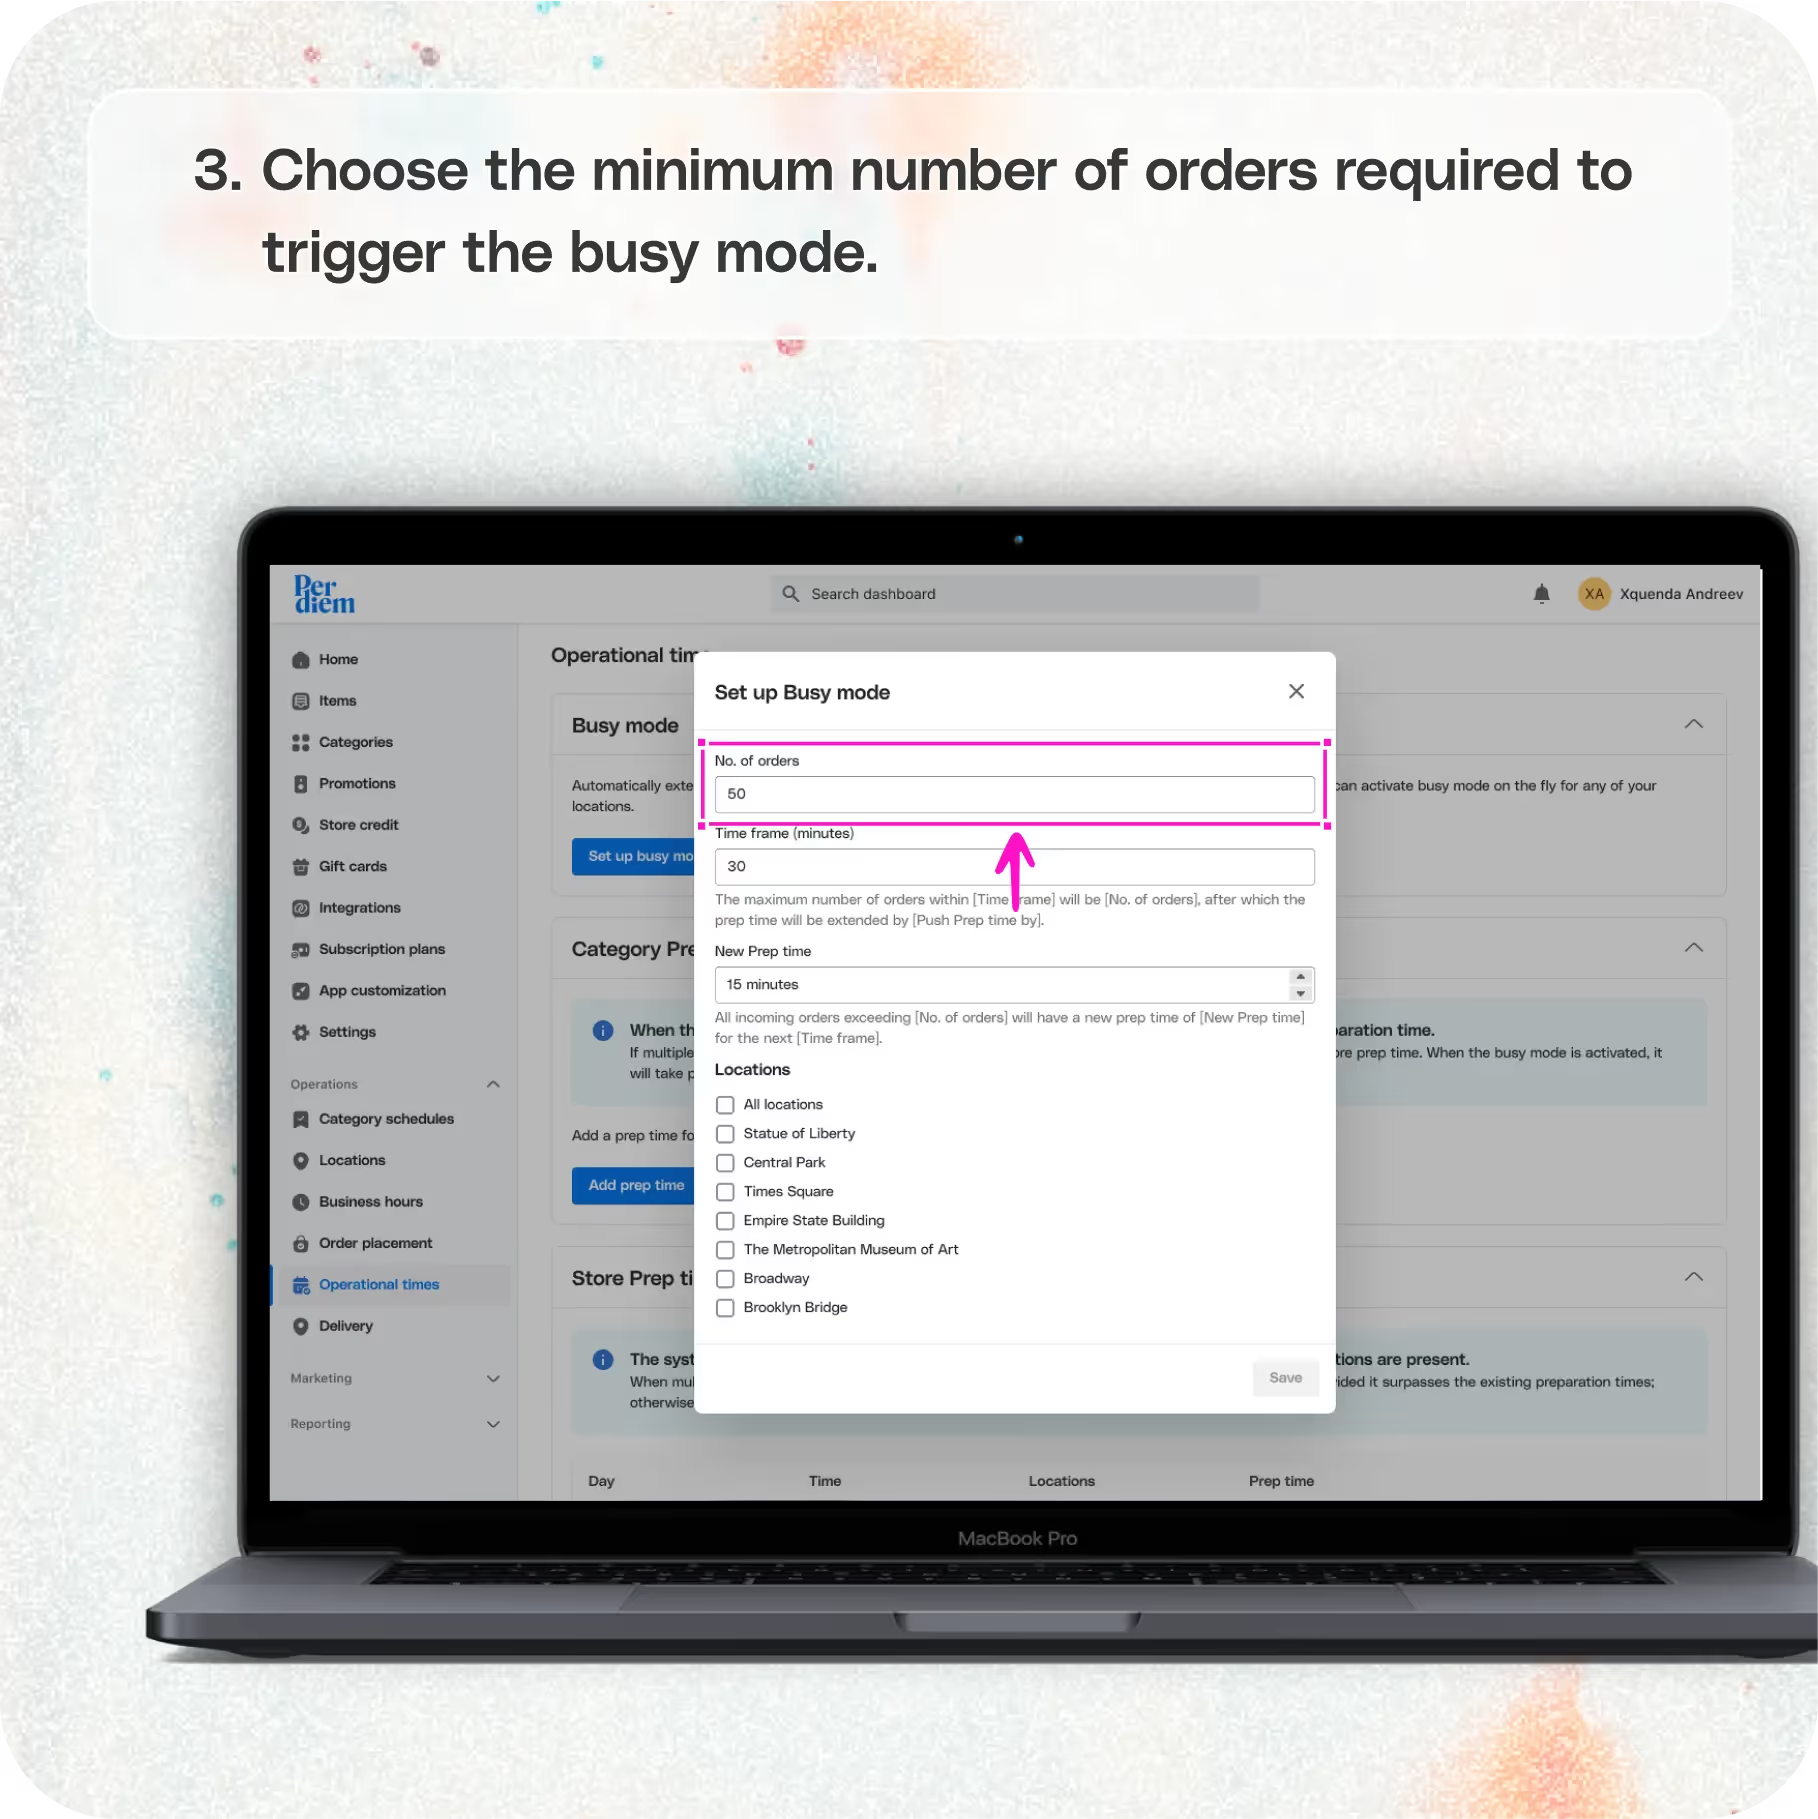
- Choose the minimum number of orders required to trigger the busy mode.
- Select the time frame during which you want the busy mode to be displayed to customers.
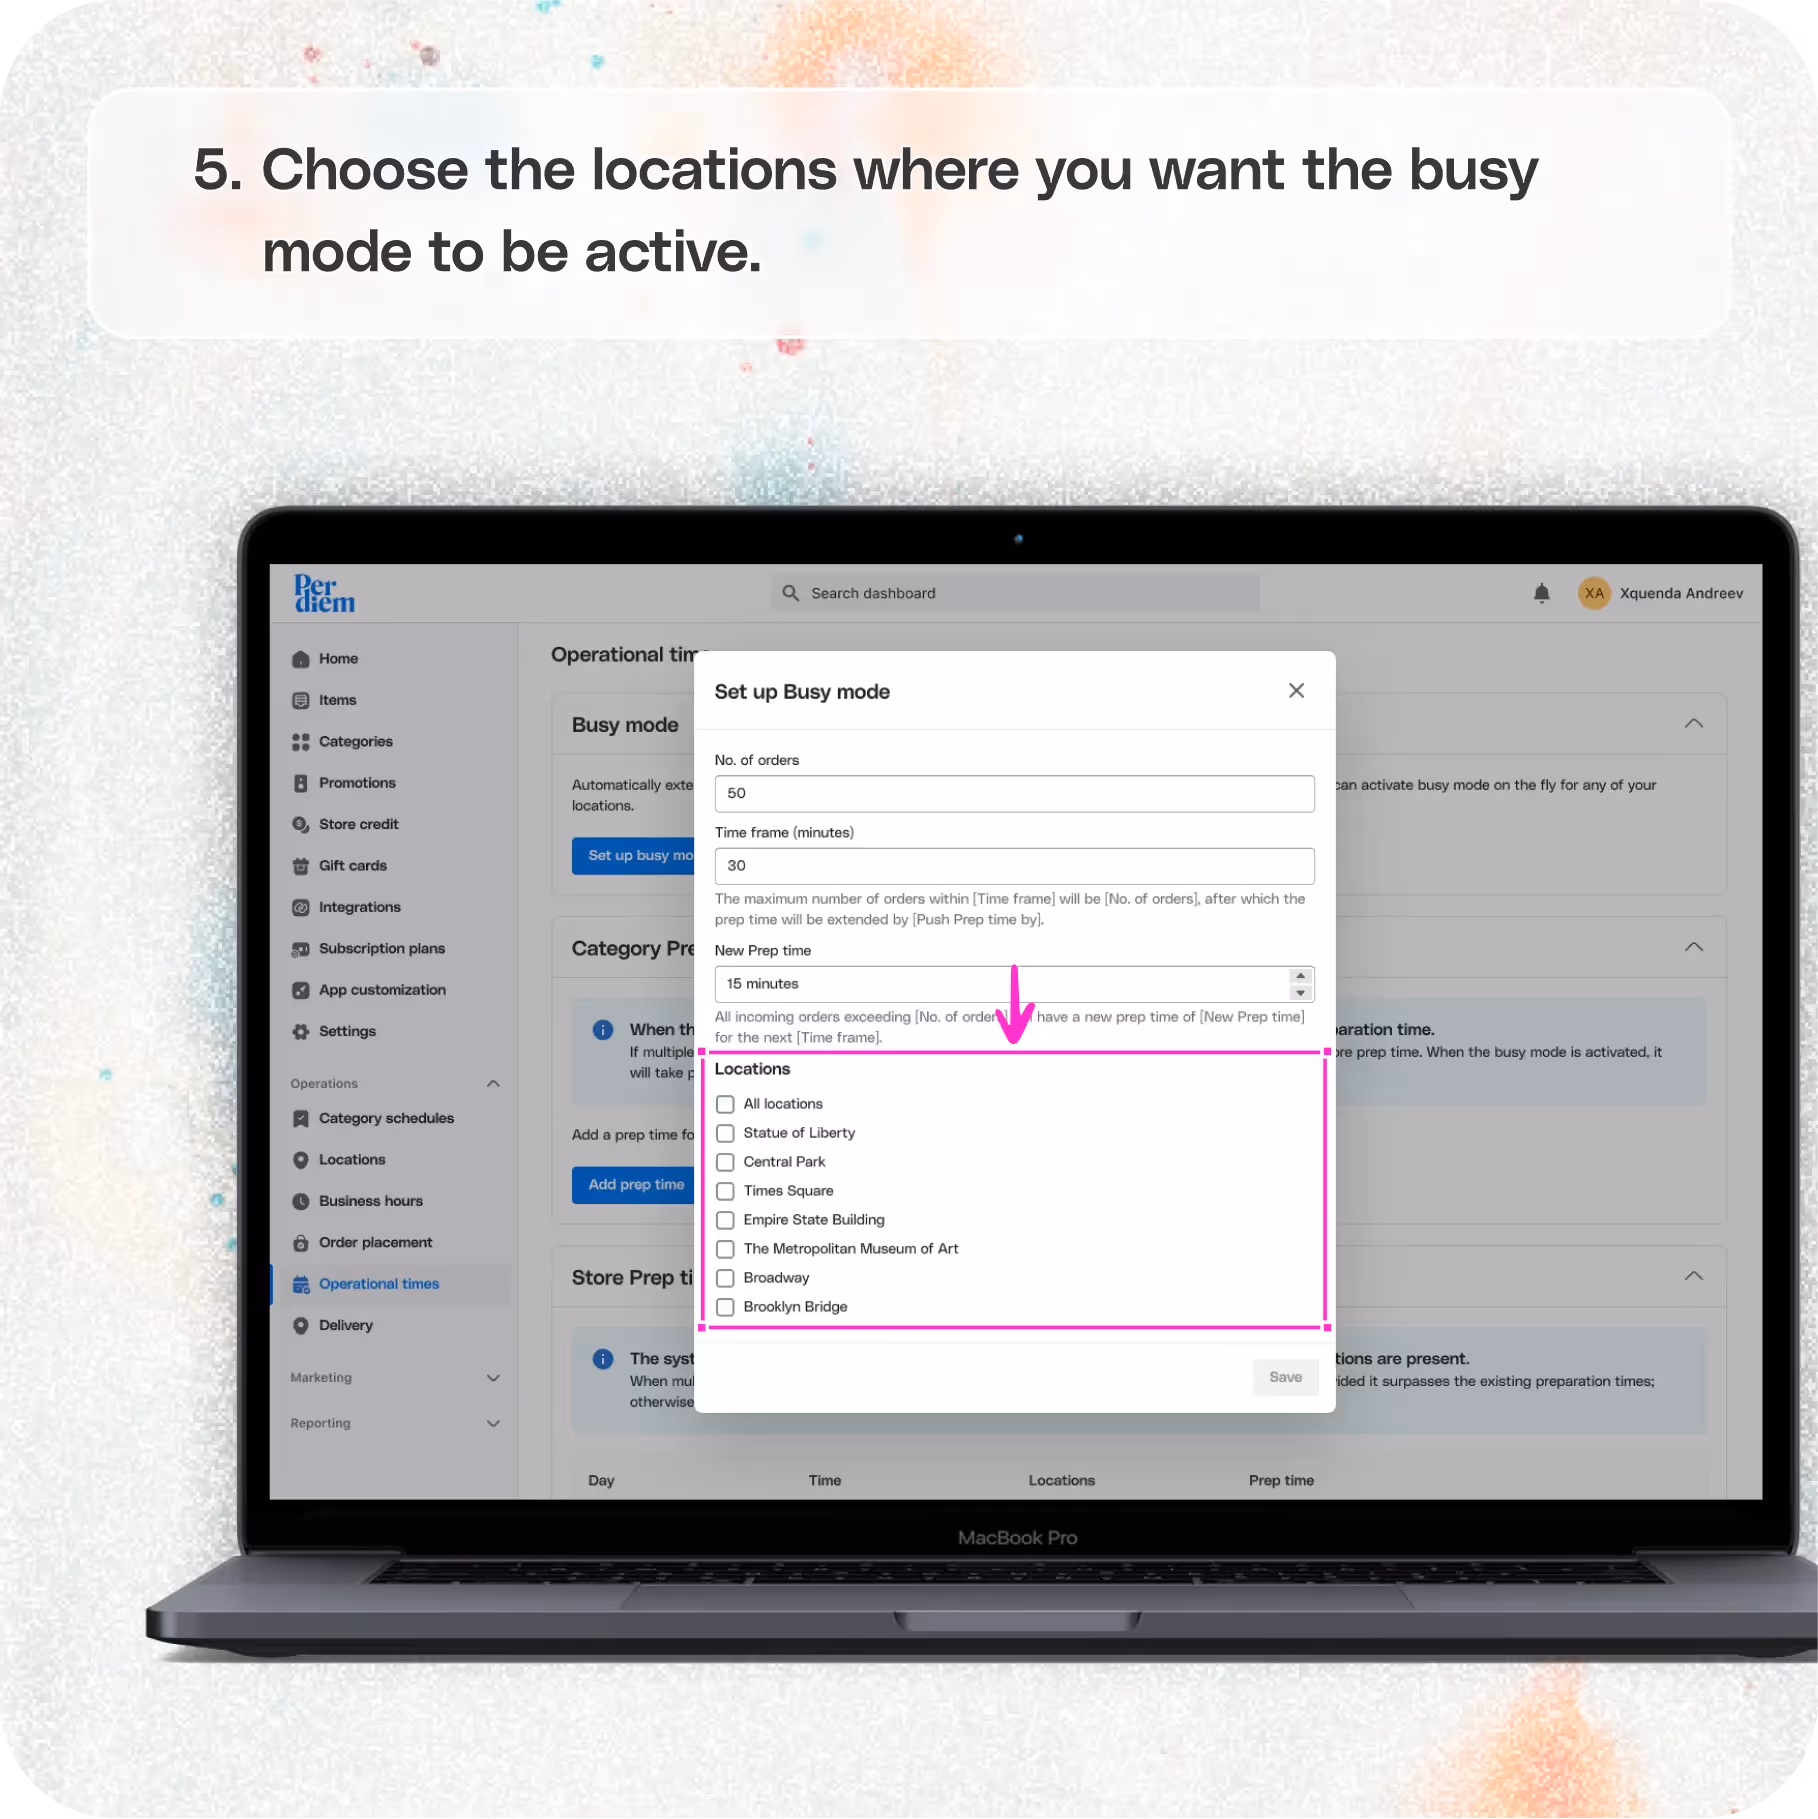
- Choose the locations where you want the busy mode to be active.
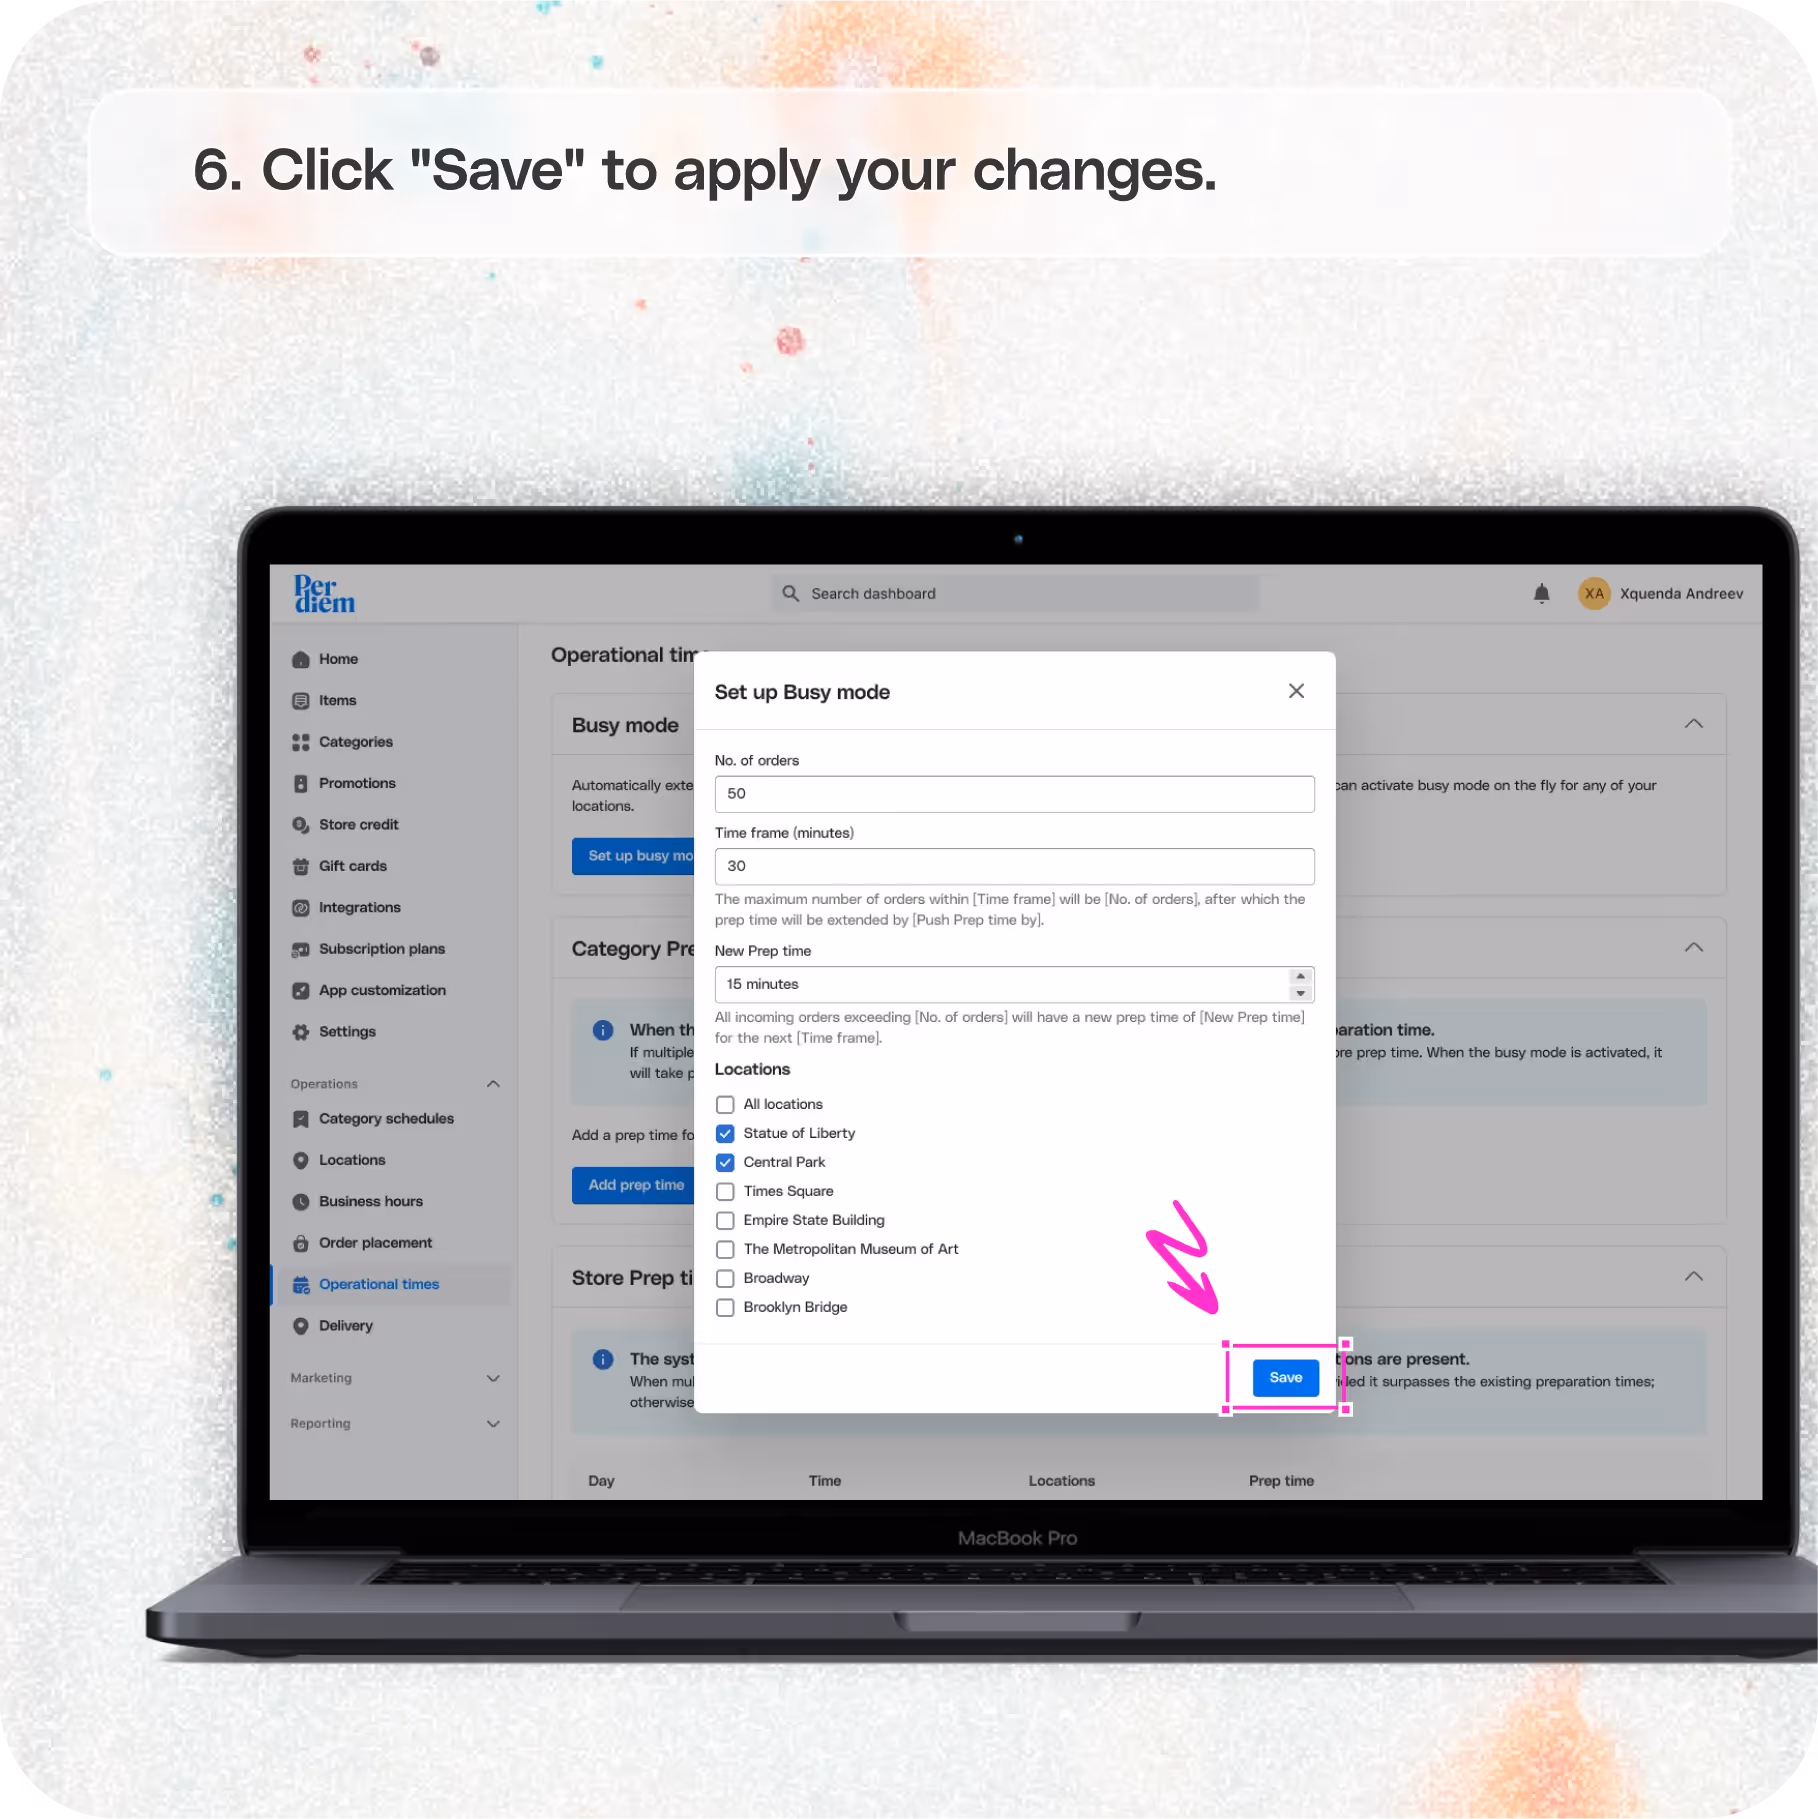
- Click "Save" to apply your changes.
Still require support?
Contact support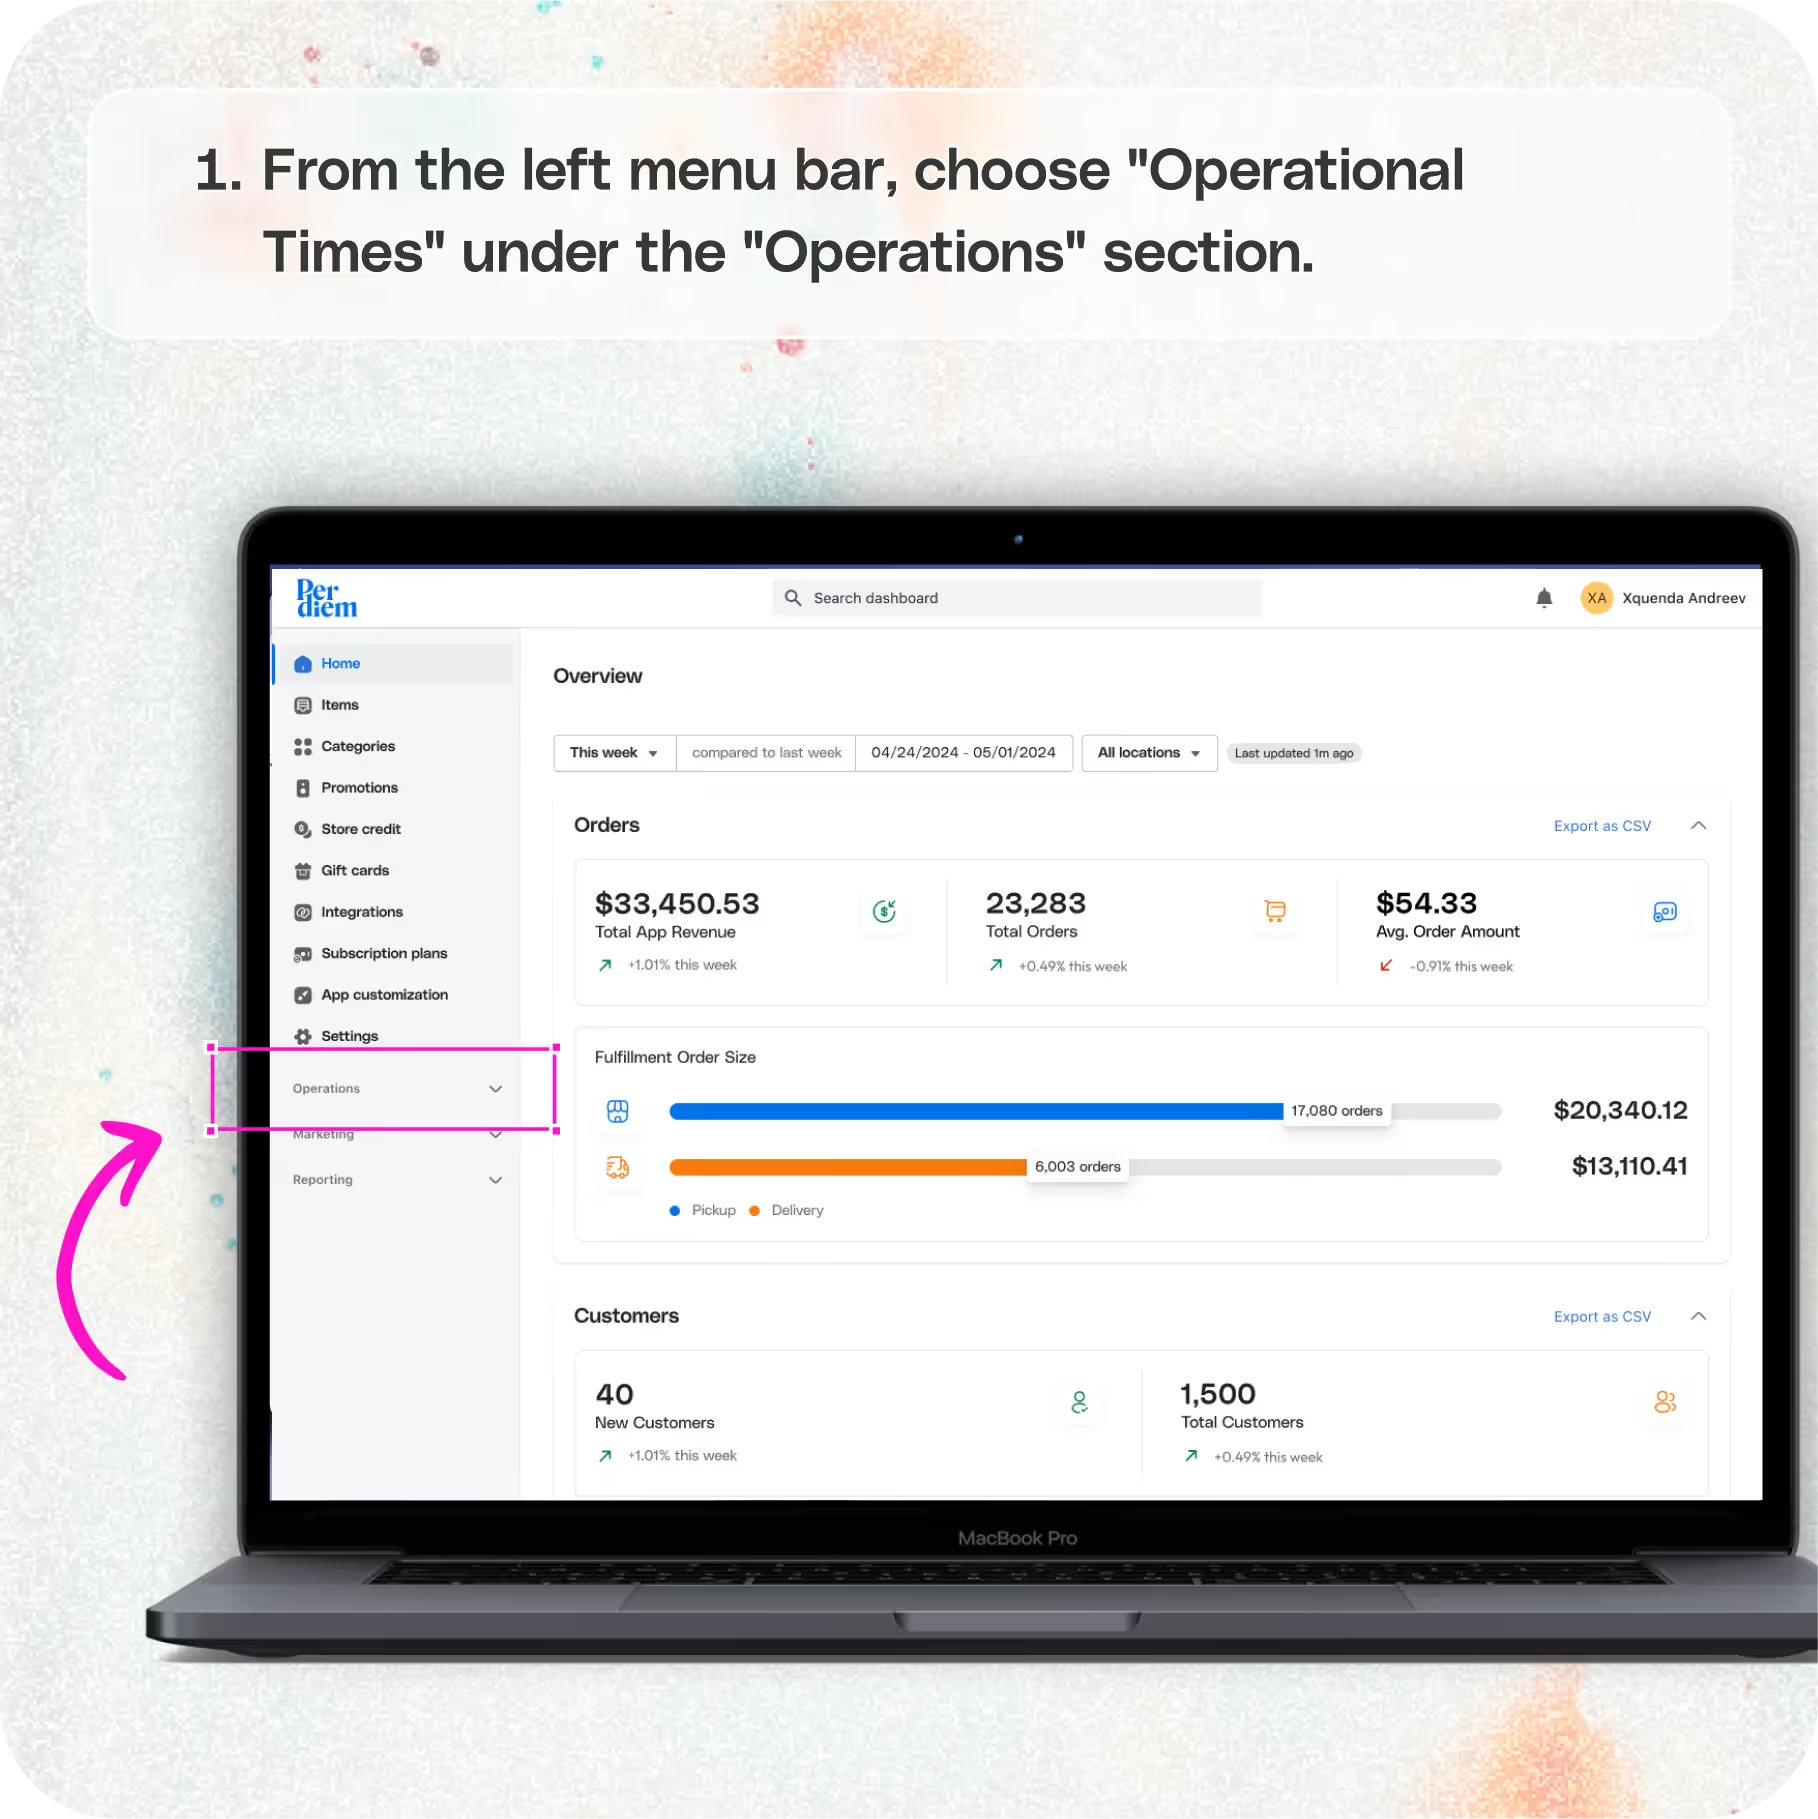

Log in to Your Merchant Dashboard
Get started with enabling Auto Busy Mode:
Step 1
Log in to your Per Diem merchant dashboard.
Go to Operational Times
Navigate to the settings for managing busy periods:
Step 1
rom the left menu bar, choose "Operational Times" under the "Operations" section.
Set Up Busy Mode
Configure the settings for peak hours:
Step 1
In the Busy Mode section, click on the "Set Up Busy Mode" button.
Step 2
Choose the minimum number of orders required to trigger the busy mode.
Join the Per Diem Local Partner Program
Submit updates to your business details for review by Per Diem’s moderation team before they go live.
Select the Time Frame
Determine when the busy mode should be active:
Step 1
Select the time frame during which you want the busy mode to be displayed to customers.
Select Locations and Hit Save
Finalize and apply your settings:
Step 1
Choose the locations where you want the busy mode to be active.
Step 2
Click "Save" to apply your changes.


.svg)


Still have questions?Contact us
Ask anything or just say hi

