
























Send emails with your custom domain
Creating a Sendgrid account is a prerequisite for sending emails from a custom domain.
Instructions
- Log in to your Per Diem merchant dashboard.
- From the left bar in your dashboard, select "Integrations."
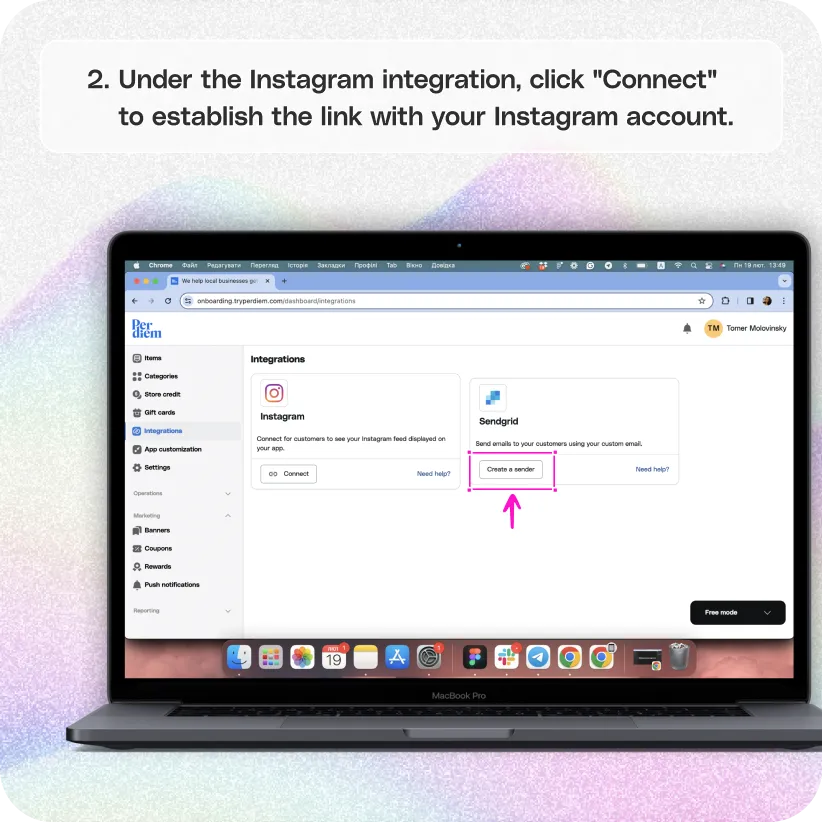
- Under SendGrid integration, click on "Create a Sender."
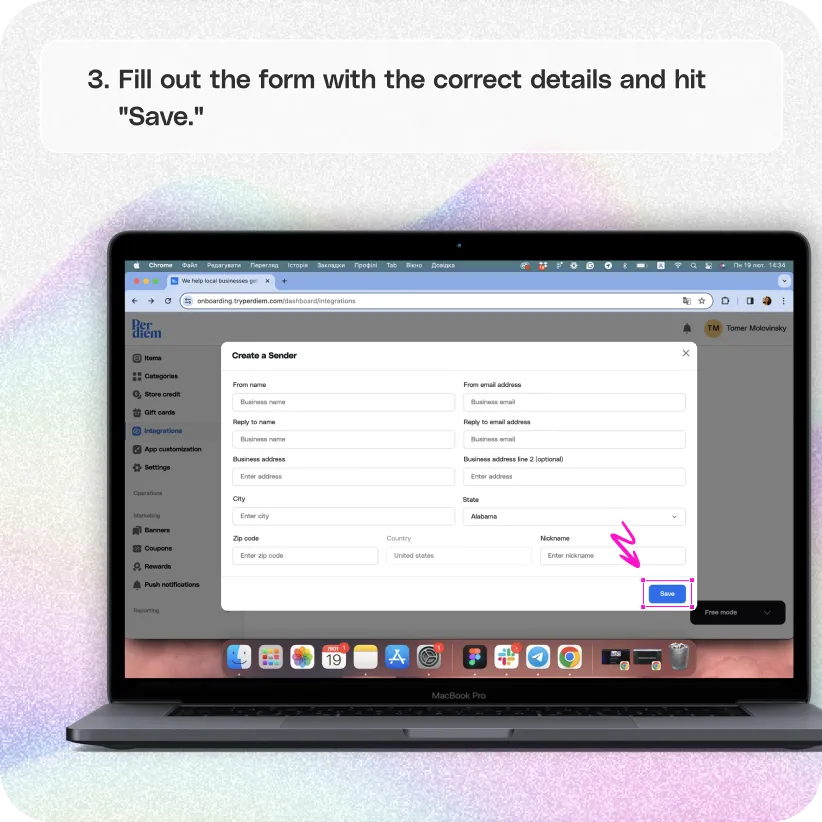
- Fill out the form with the correct details and hit "Save."
- A verification email will be sent to you.
- Go to your email to complete the verification process.
- Make sure you're logged in to your SendGrid account.
- Refresh the page in your Per Diem merchant dashboard to get the latest data once the verification process is done.
Still require support?
Contact support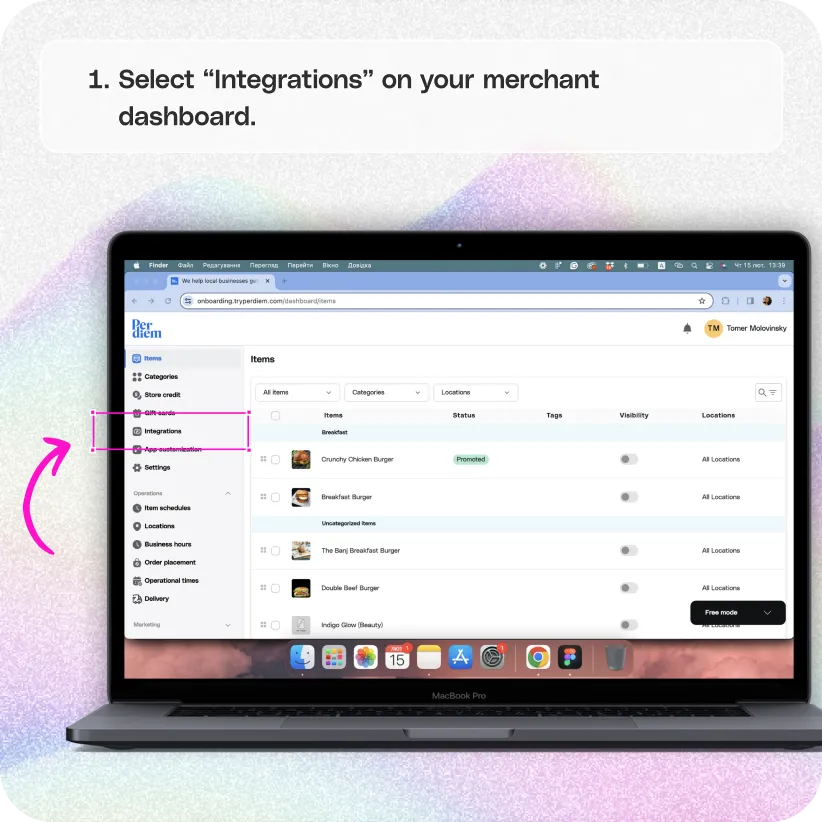
Log in to Your Merchant Dashboard
Empower your communication strategy by sending custom emails:
Step 1
Log in to your Per Diem merchant dashboard.
Select Integrations
Facilitate seamless email communication by integrating SendGrid:
Step 1
From the left bar in your dashboard, select "Integrations."
Create a Sender
Initiate the process of sending custom emails with SendGrid:
Step 1
Under SendGrid integration, click on "Create a Sender."
Fill the Form
Ensure accurate details for effective email communication:
Step 1
Fill out the form with the correct details and hit "Save."
Verification Process
Verify your custom email sender through the following steps:
Step 1
A verification email will be sent to you.
Step 2
Go to your email to complete the verification process.
Step 3
Make sure you're logged in to your SendGrid account.
Refresh your Dashboard
Refresh the page in your Per Diem merchant dashboard to get the latest data once the verification process is done.
Still have questions?Contact us
Ask anything or just say hi